Urban Remodel
Crescent Heights
Brief
Remodel of a home with dated kitchen and bathroom. Opening up dark interiors. Demolition to studs, add skylights, raise ceilings, new cabinetry, fixtures, tile-work, wall finishes, and flooring.
Tools
- Photoshop
Role
- Designer
- Client
Year
2009
Context
My first remodeling project was a gut renovation near West Hollywood, California. My wife and I owned a 1920s home with a dated kitchen and bathrooms from the 1970s. We interviewed several contractors to get an idea about what could be accomplished with a reasonable budget before settling on a 2 phase plan with Gerald Landess of Zia Construction.
Phase 1 would focus on the kitchen and upgrades in the rest of the house. We resurfaced plaster & lathe walls throughout the house, upgraded the wiring, and replaced the hardwood flooring.
Phase 2 the following year would focus on the bathrooms which were really dark and dated.
I was the designer & client. I provided design sketches to my general contractor, sourced all the finish materials and fixtures. I was working at one of the studios at that time and did not want to spend more time than was necessary relearning AutoCad so I took a hybrid approach:
- Pencil drawings for my contractor and his draftsman to convert to permit documentation.
- Photoshopped images and textures to lock down the look better.
For someone with my architecture background it was a good working method. I didn't need detailed design drawings for what I was after and I was checking in on the work almost daily.
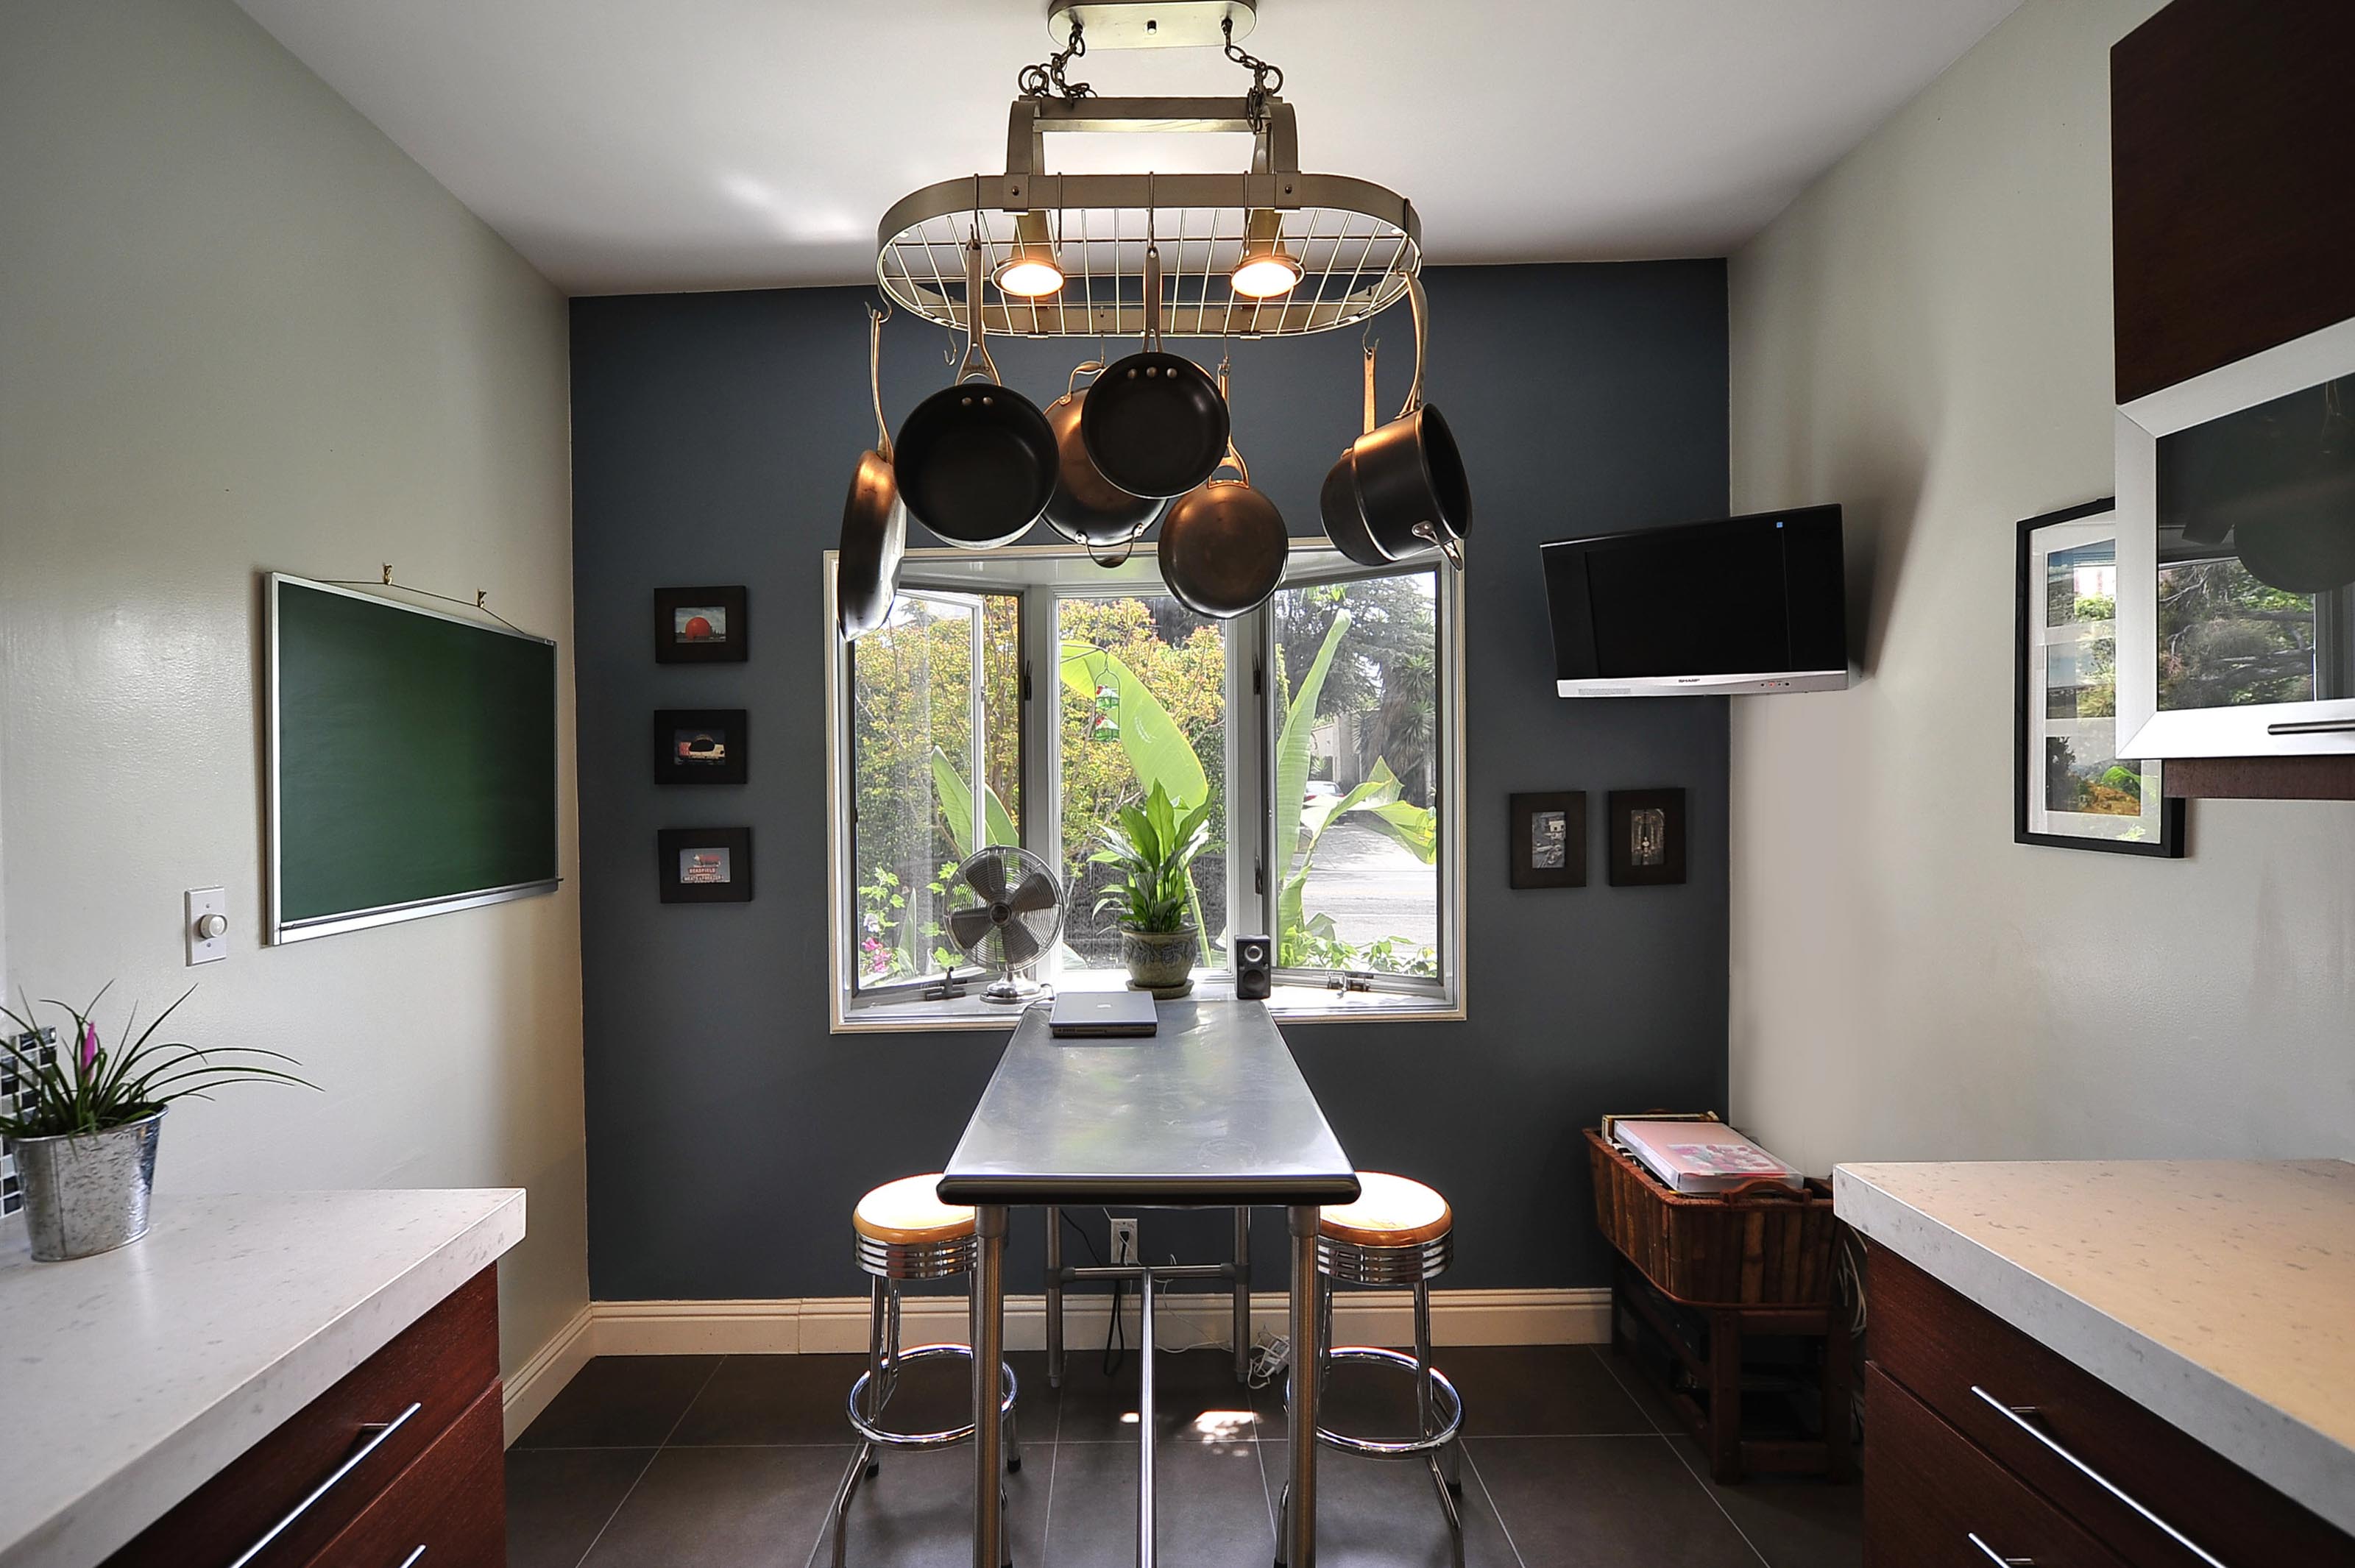
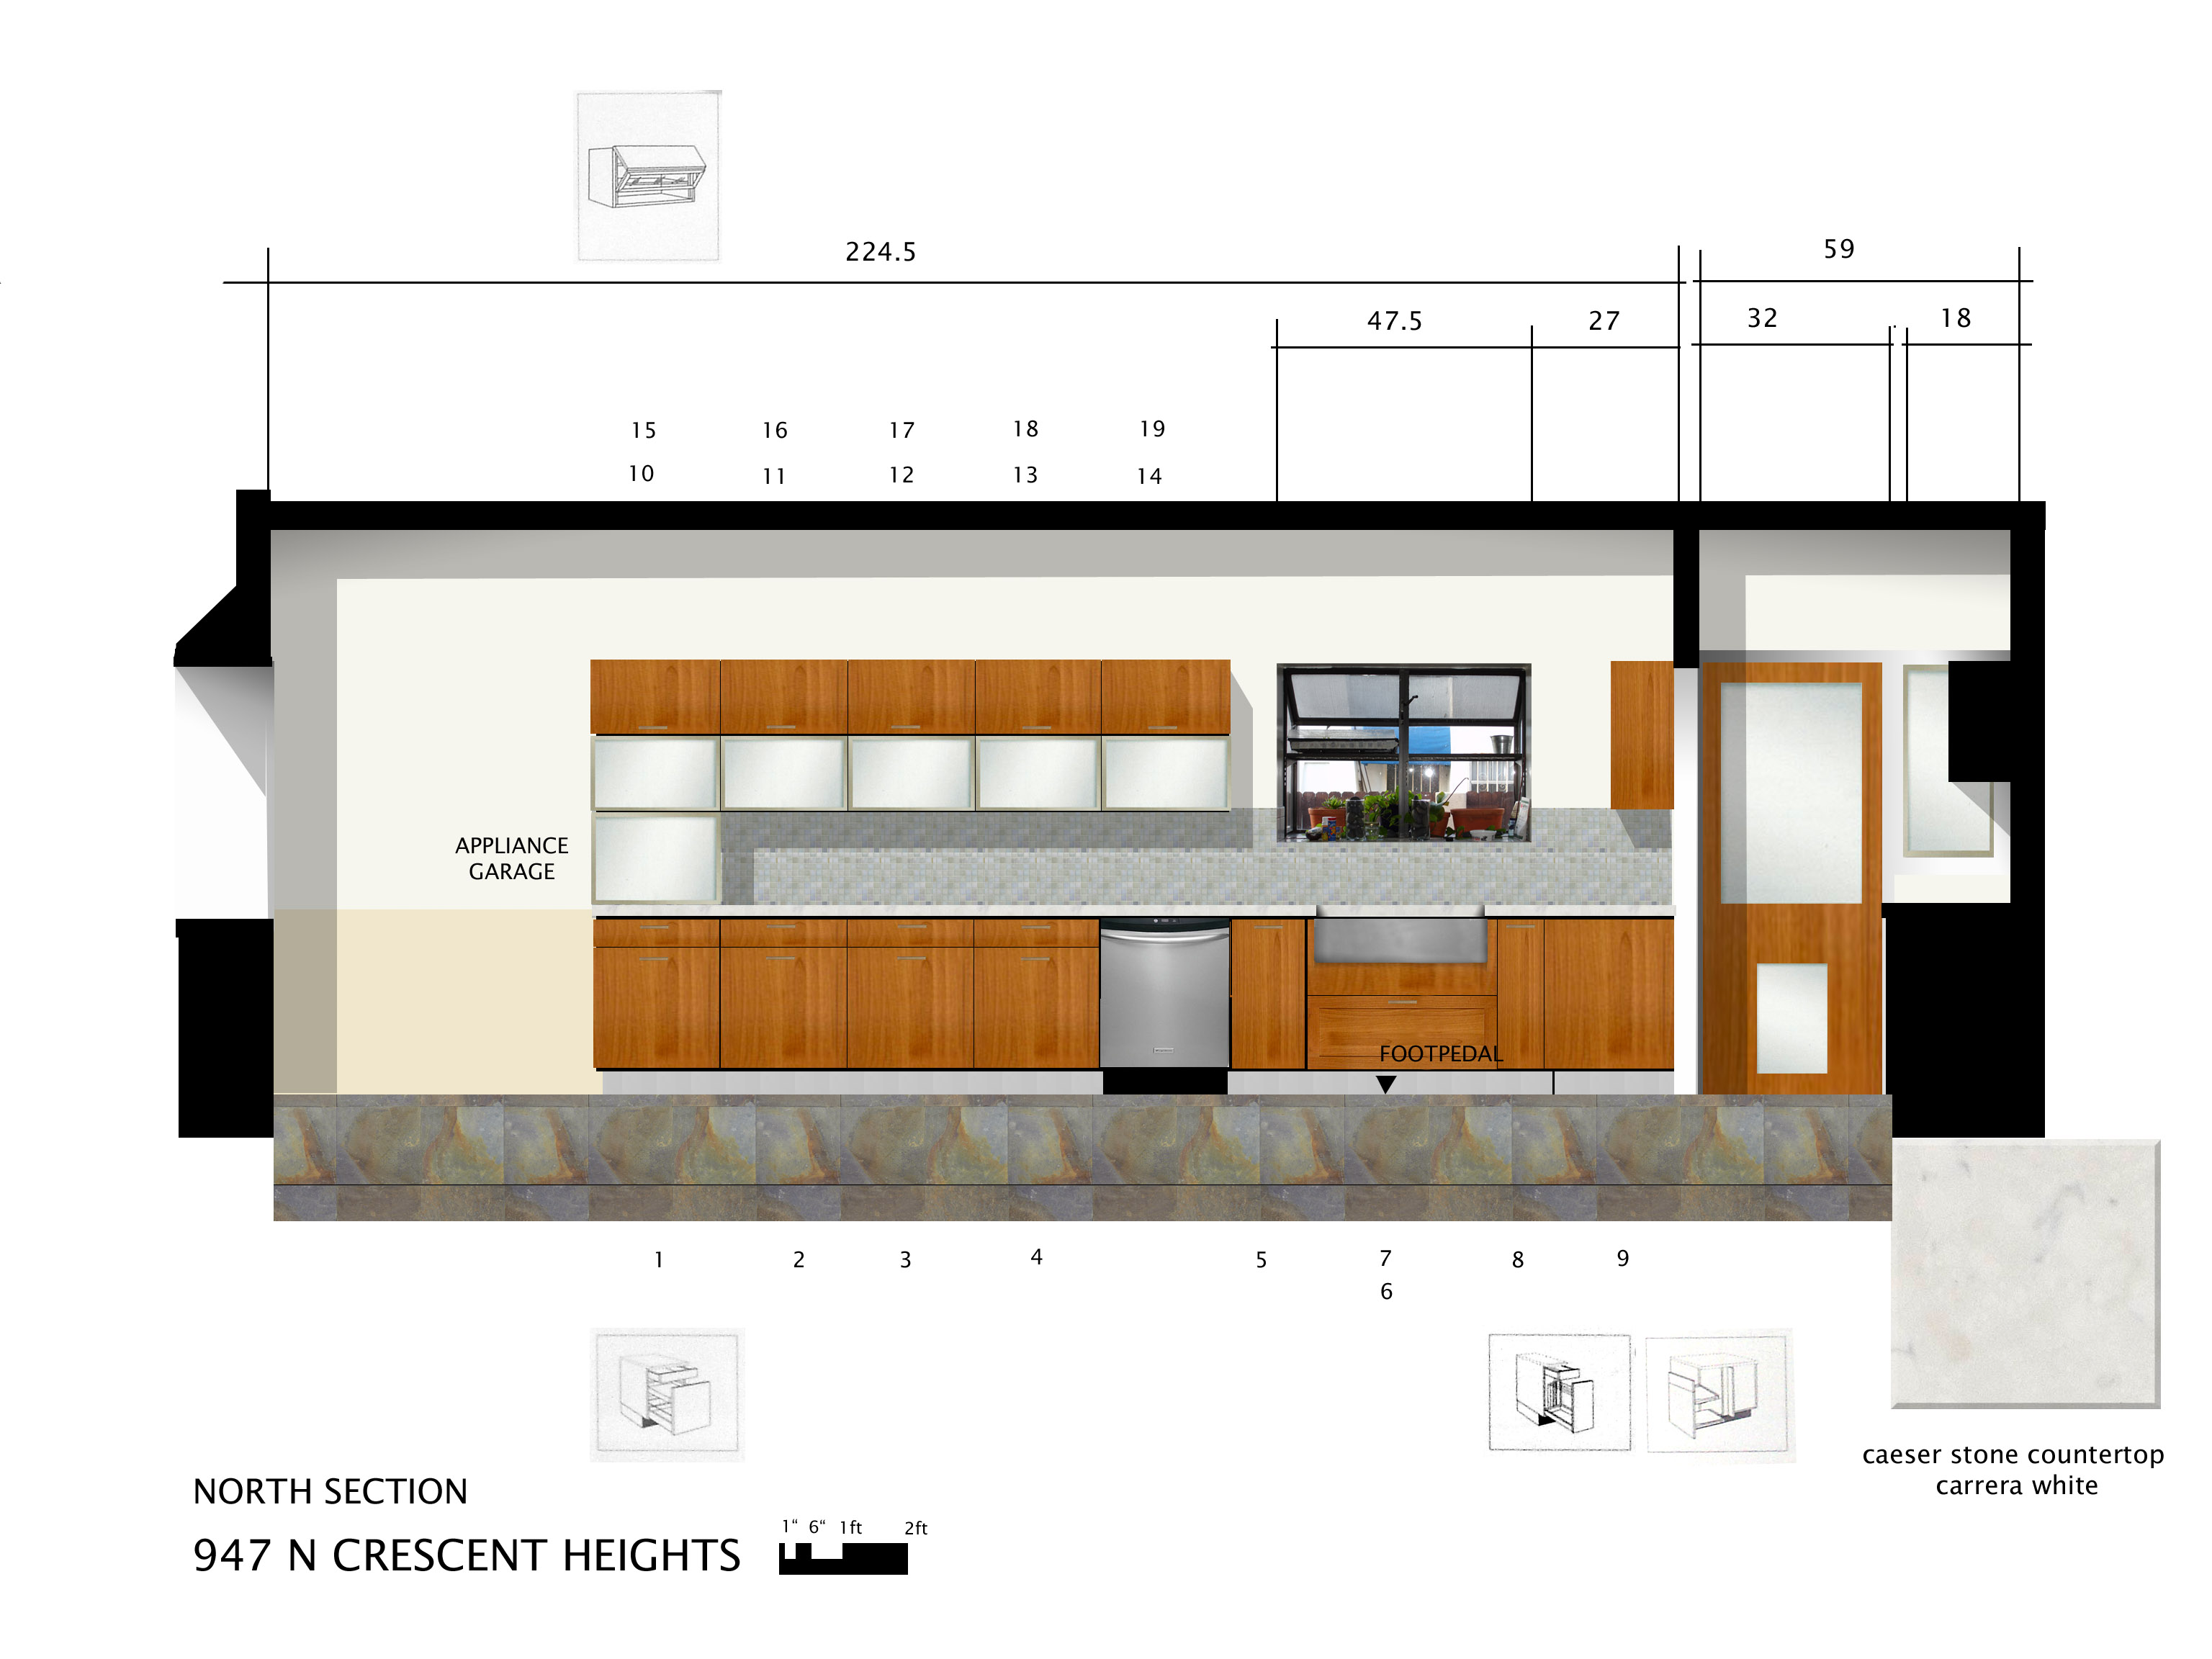
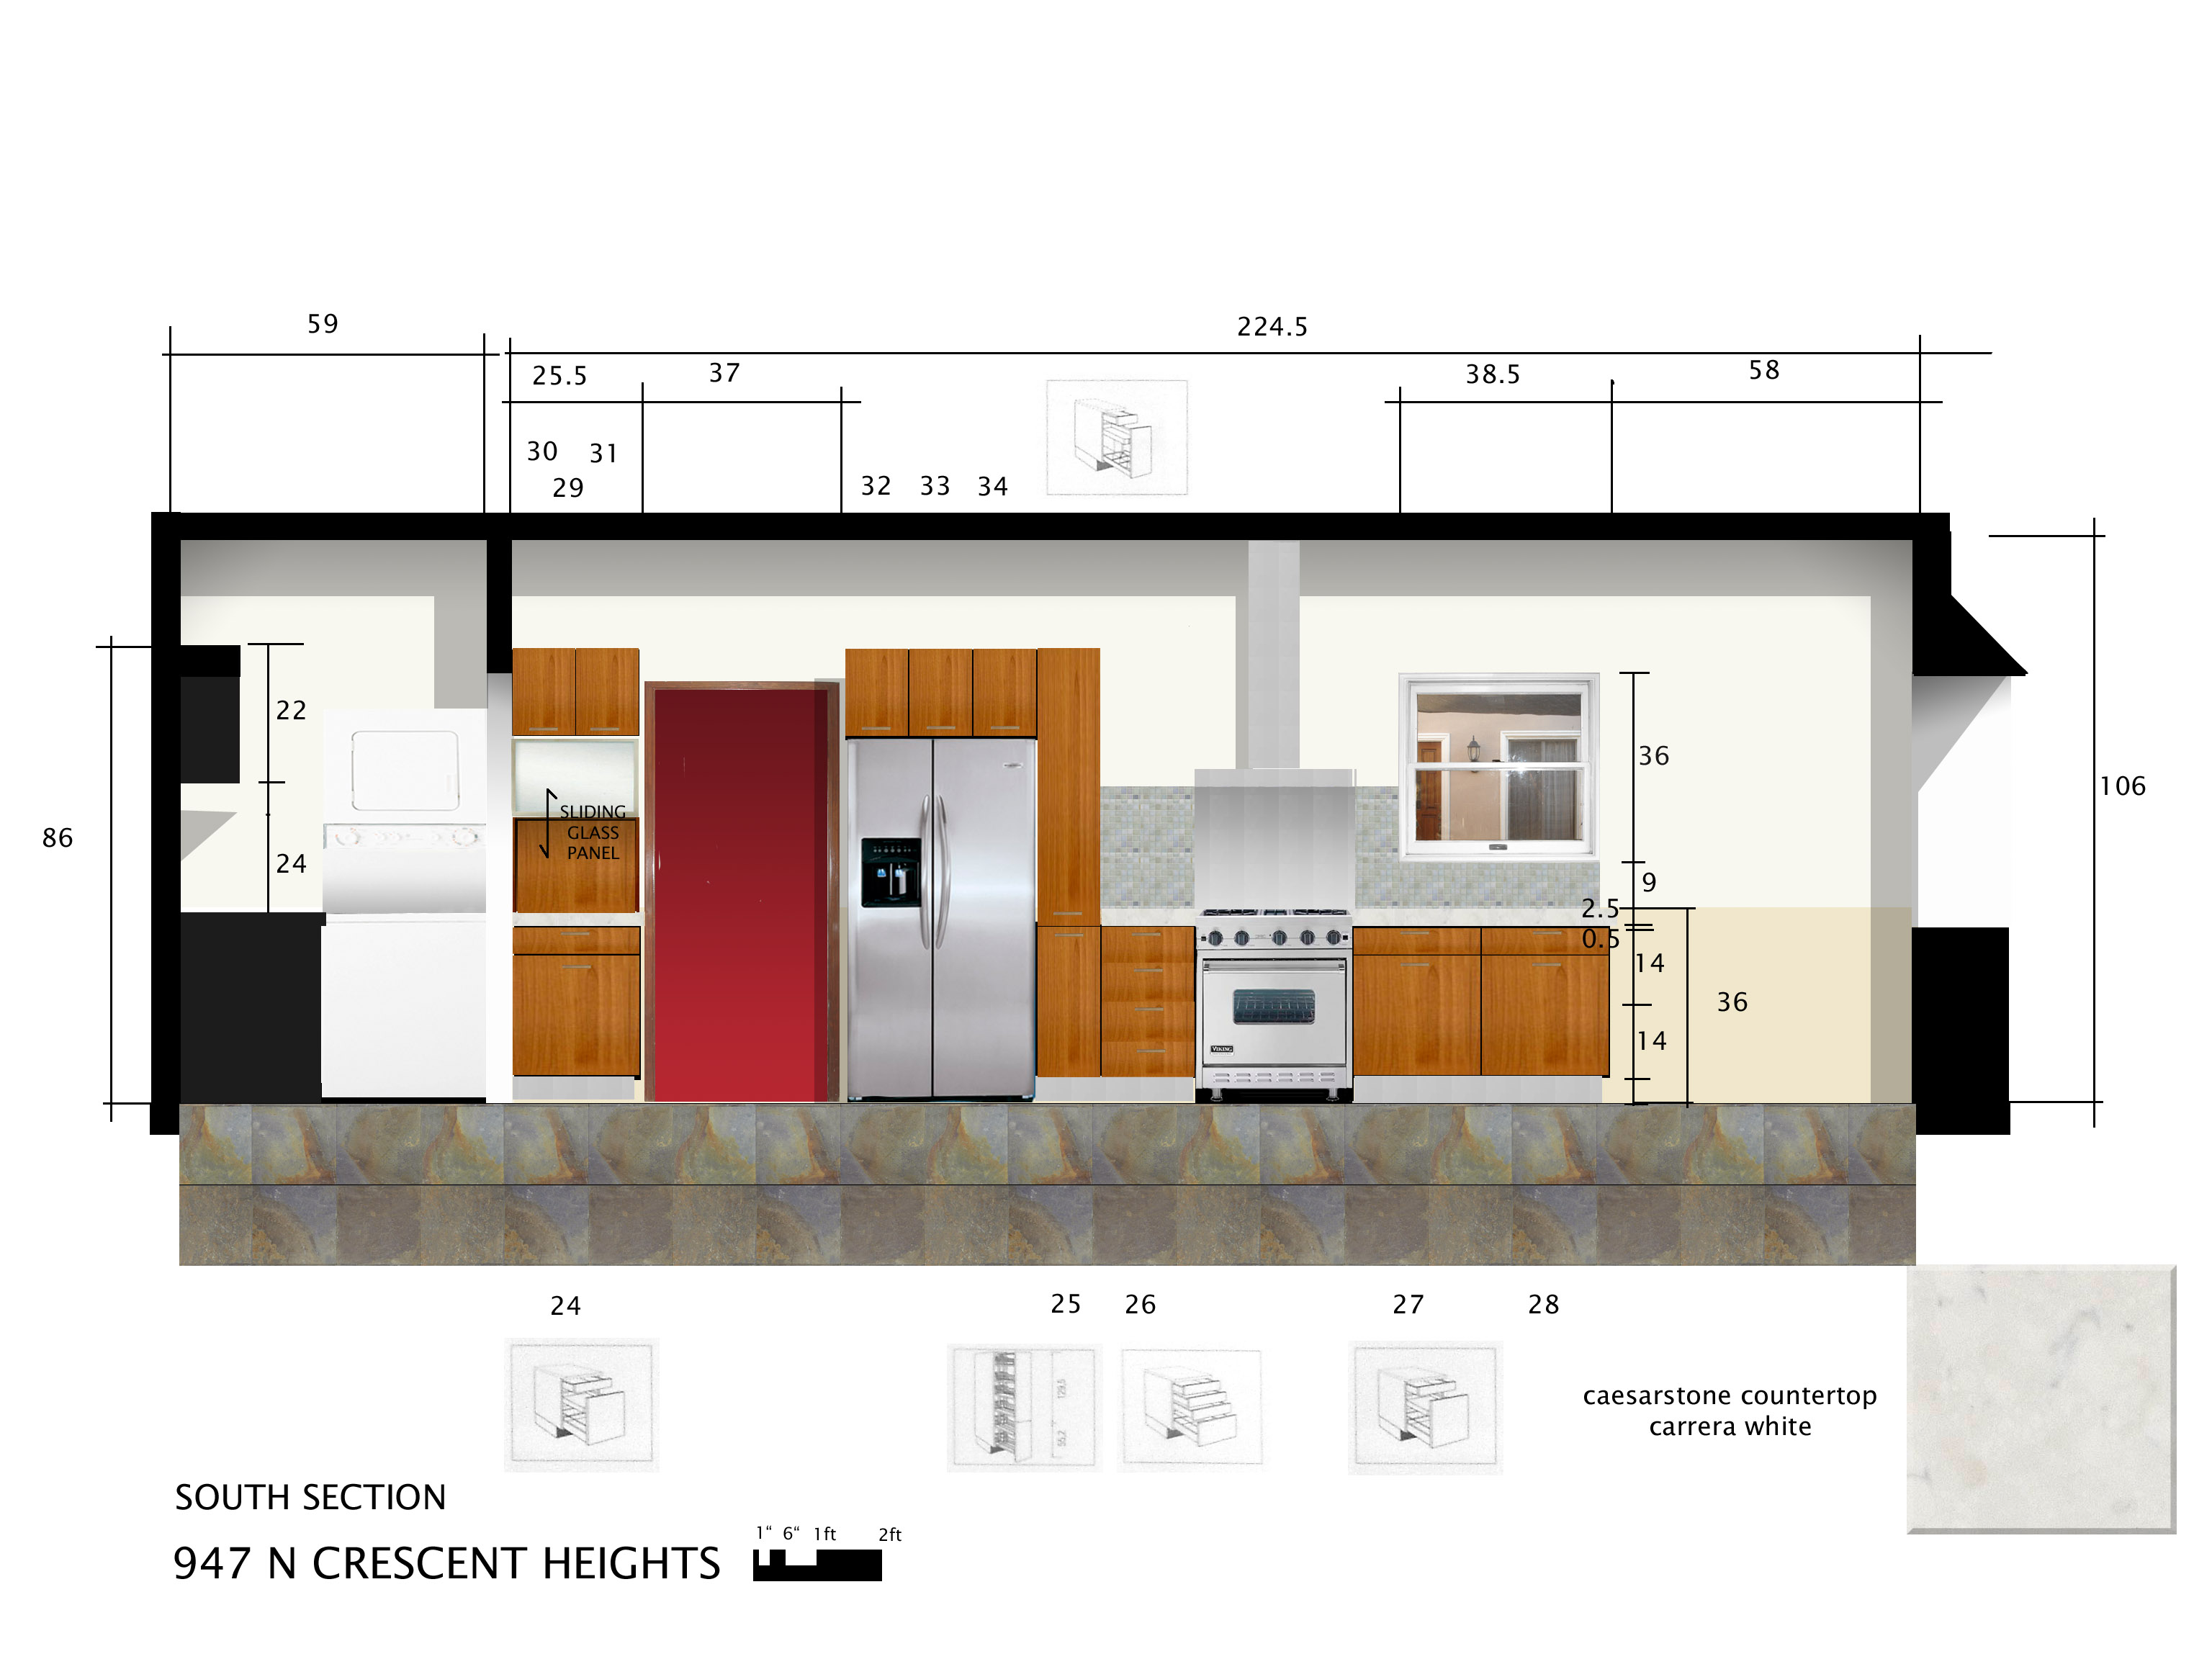
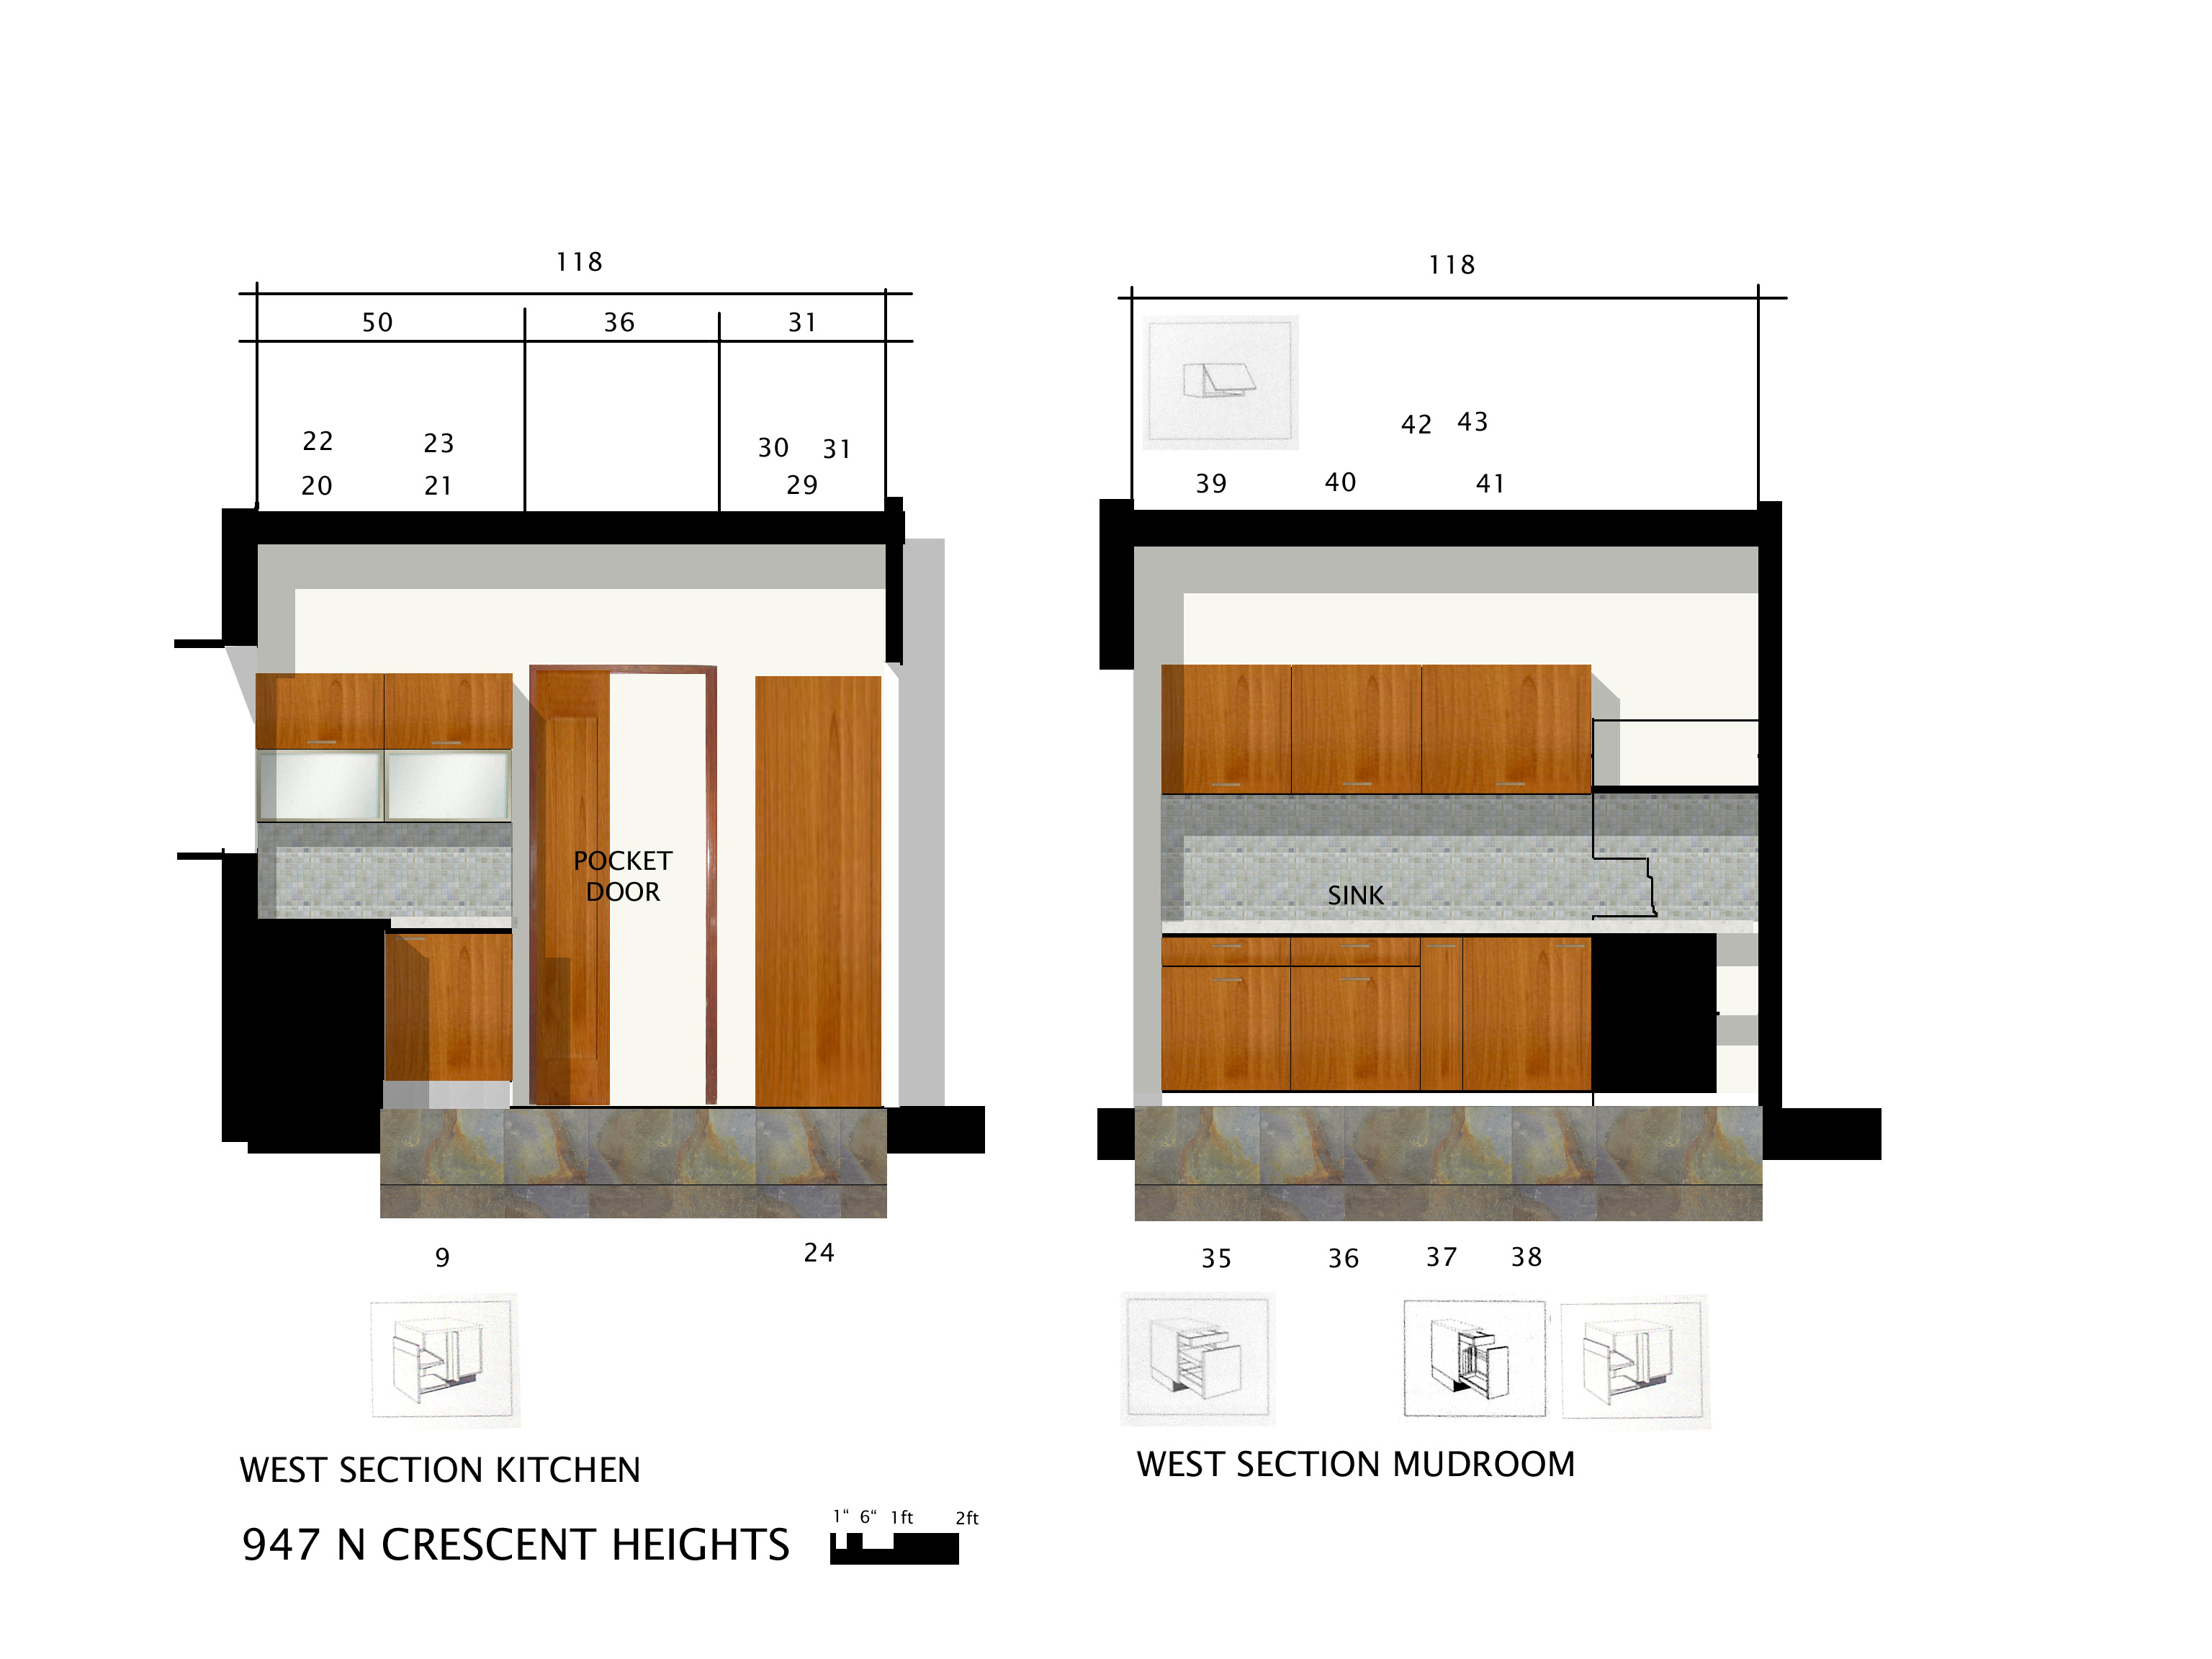
In the kitchen we removed the 70s style dropped ceiling and replaced one structural beam. We were able to get an 11ft ceiling and open up the space considerably.
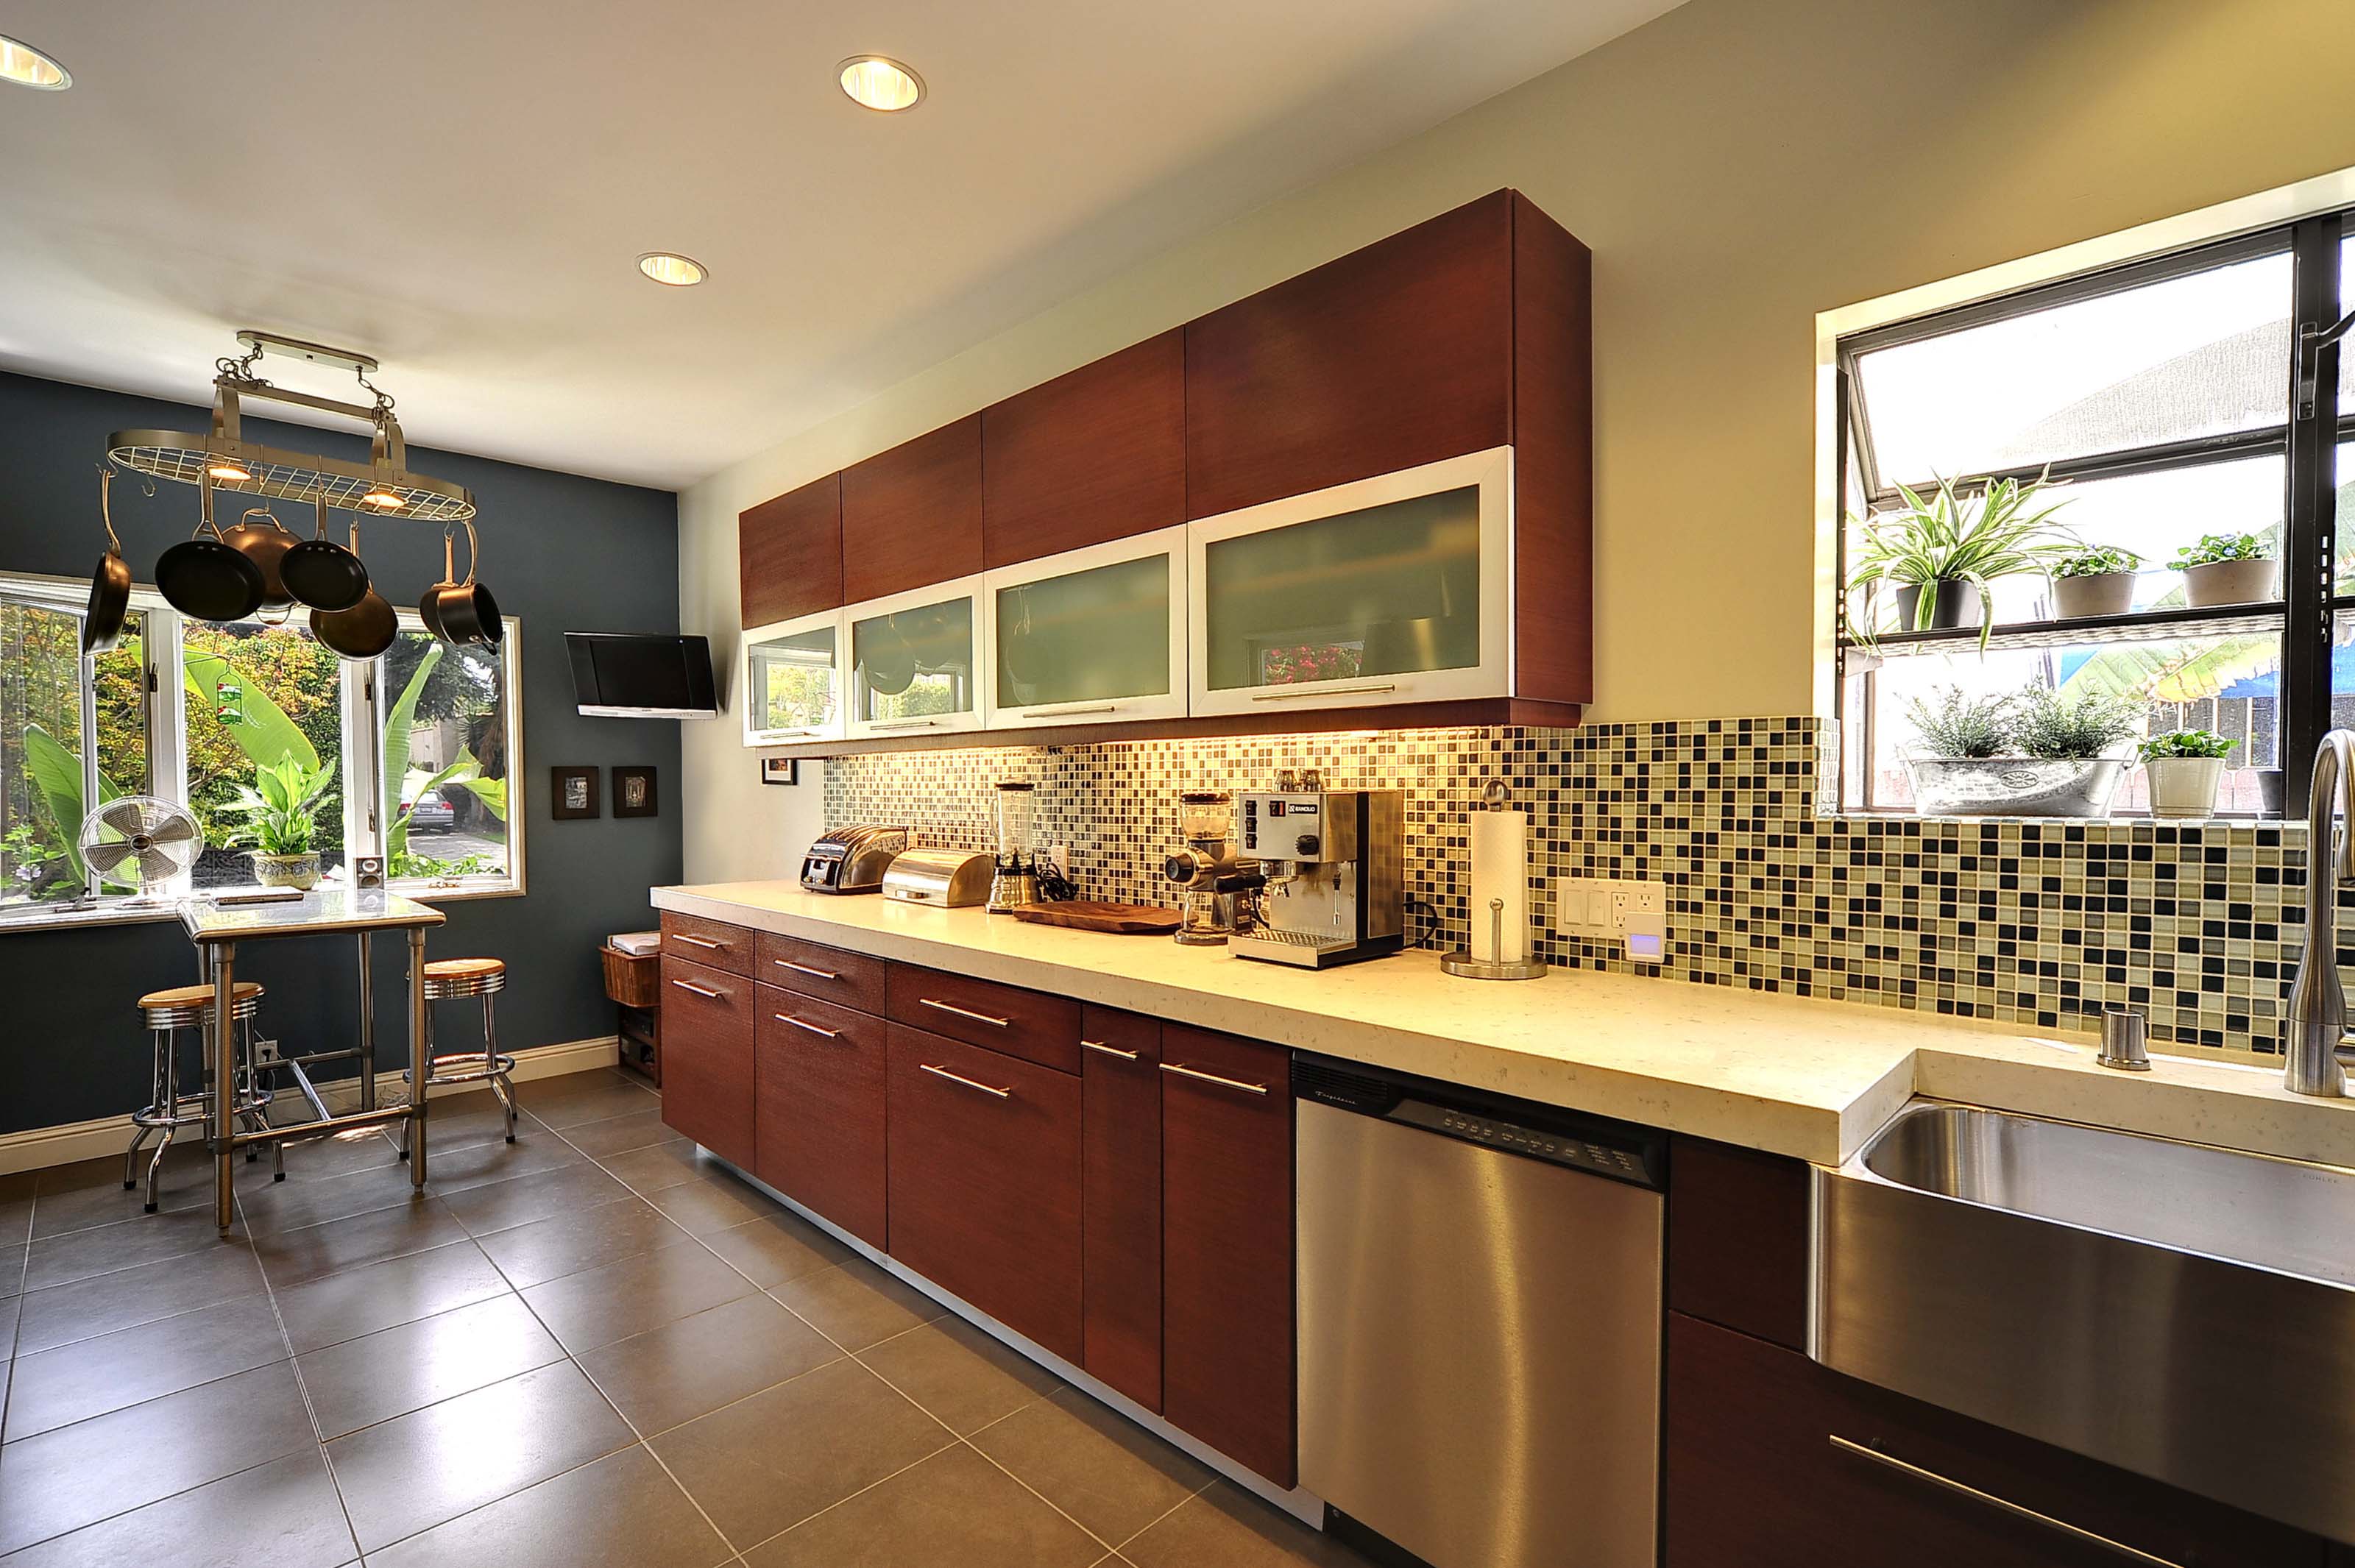
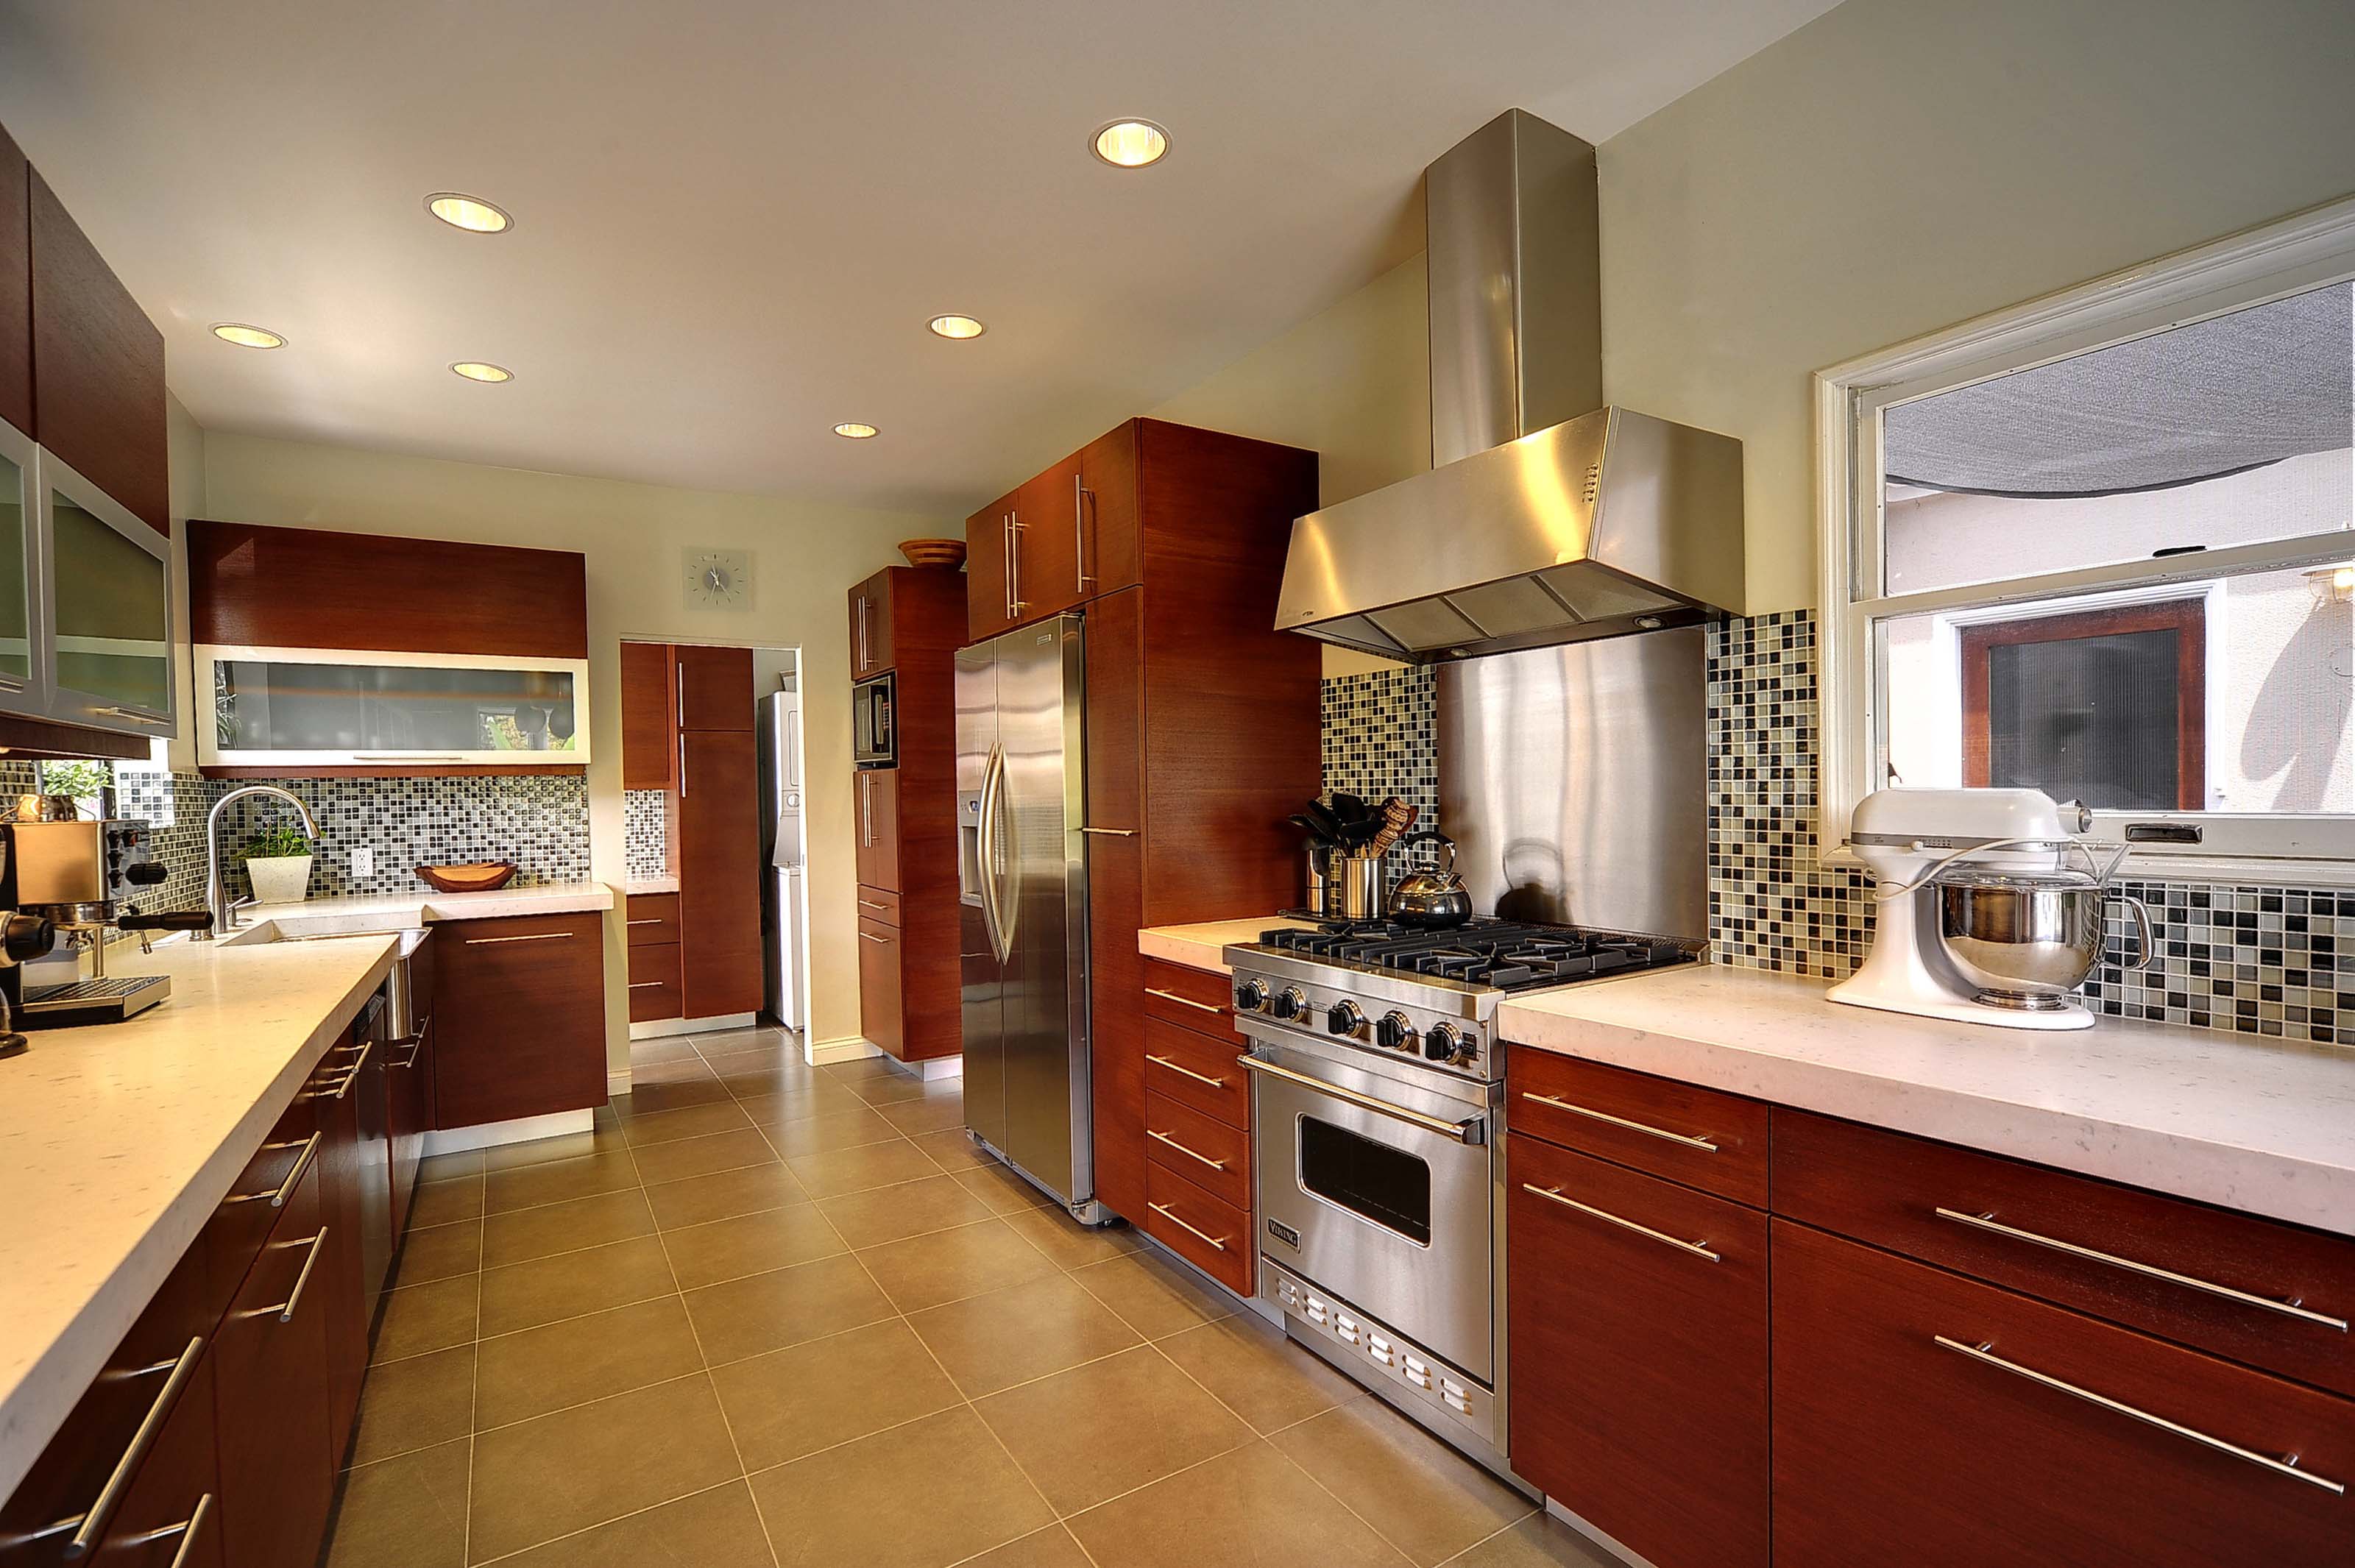
We ordered custom cabinetry from a Ohanessian Cabinetry in Glendale to get a minimal look with a cherry veneer. In 2009 it was still hard to get European style frameless cabinetry outside of very high end dealers shipping from Italy or Germany. We didn't want any surprises after delivery so we opted to pay the premium and stay with a local source.
I provided measured drawings of the required cabinetry which the cabinetmaker cross checked on site with Gerry the General Contractor. About 8 weeks later we finalized the finishes and provided specs for the interior Blum hardware and dividers.
By that time the new tile floor had been laid so the cabinetmaker was able to install in a few days. This was followed by the Caeserstone Quartz countertops a few days later and the tile backsplash shortly afterwards.
We began the 2nd phase a year after completing the kitchen. The key moves were to introduce more light into both bathrooms by opening up the ceilings with large skylights over the bathing area, replacing old fixtures in the same locations and resurfacing the walls.
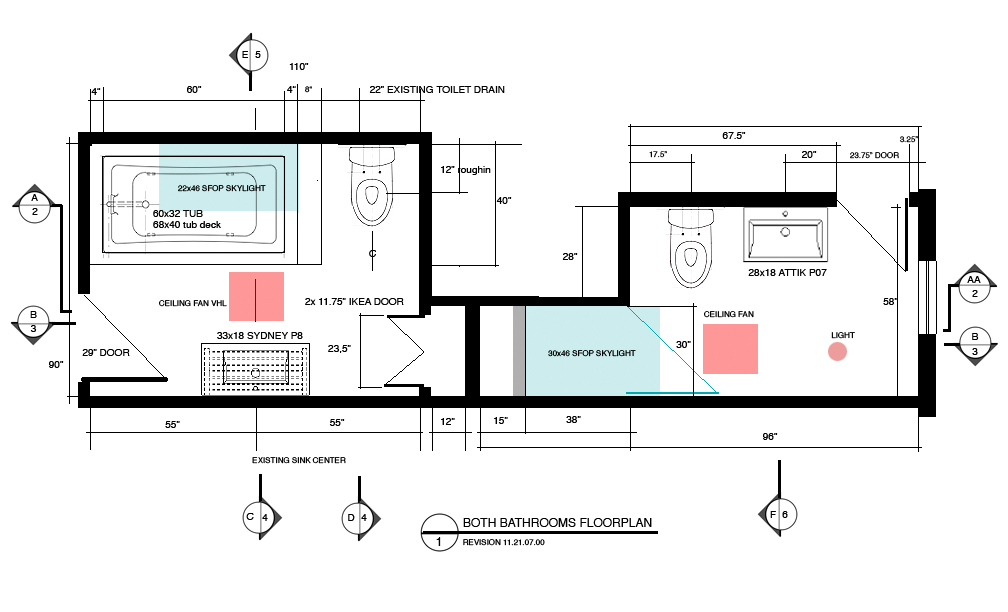
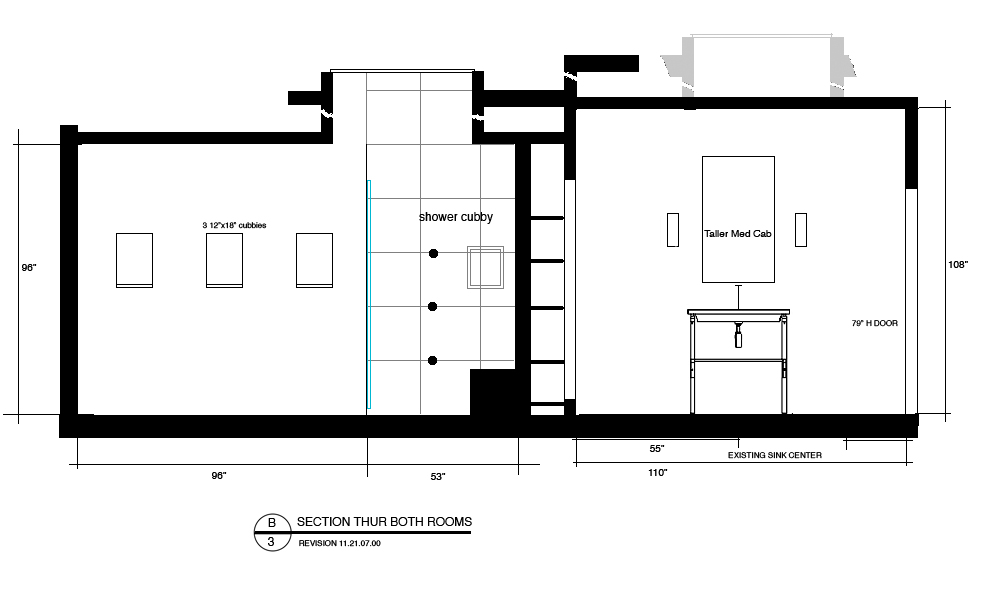
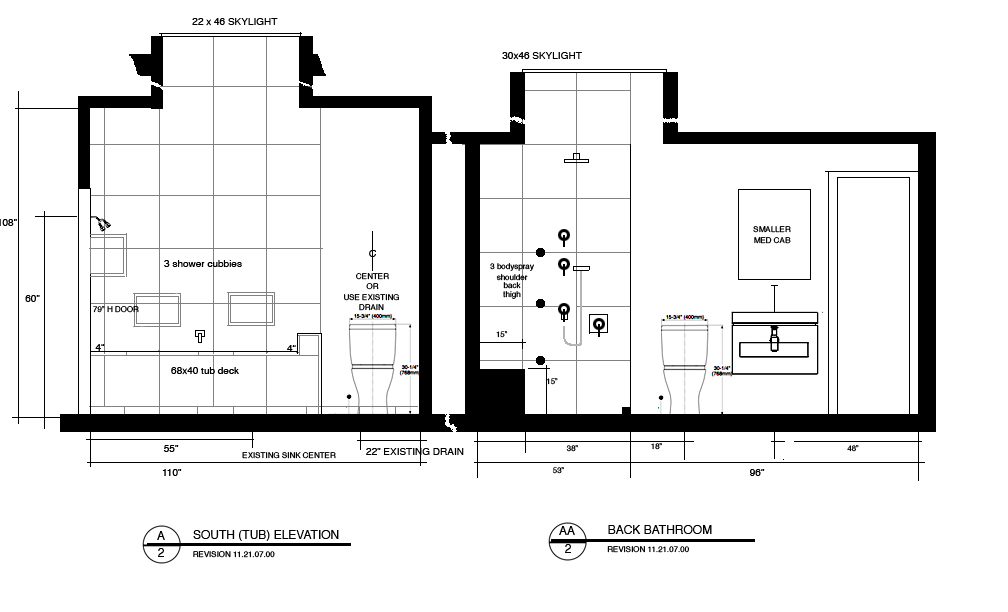
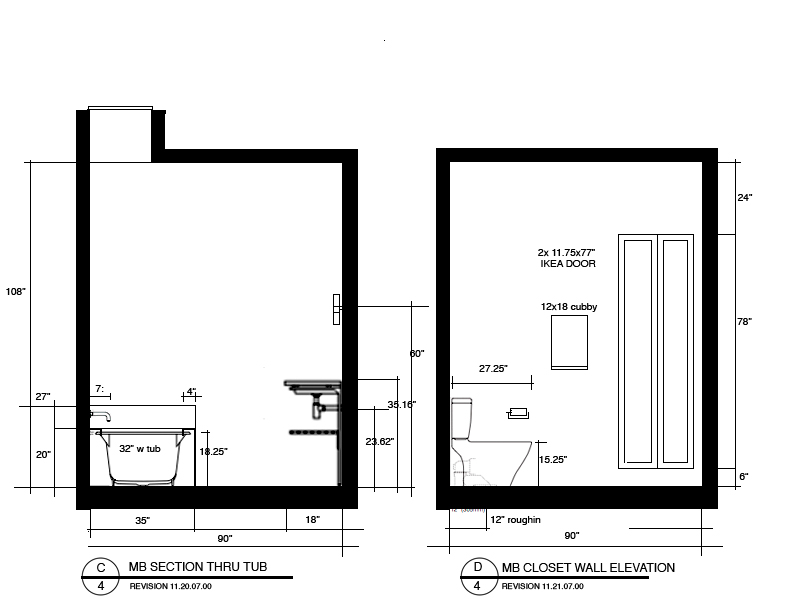
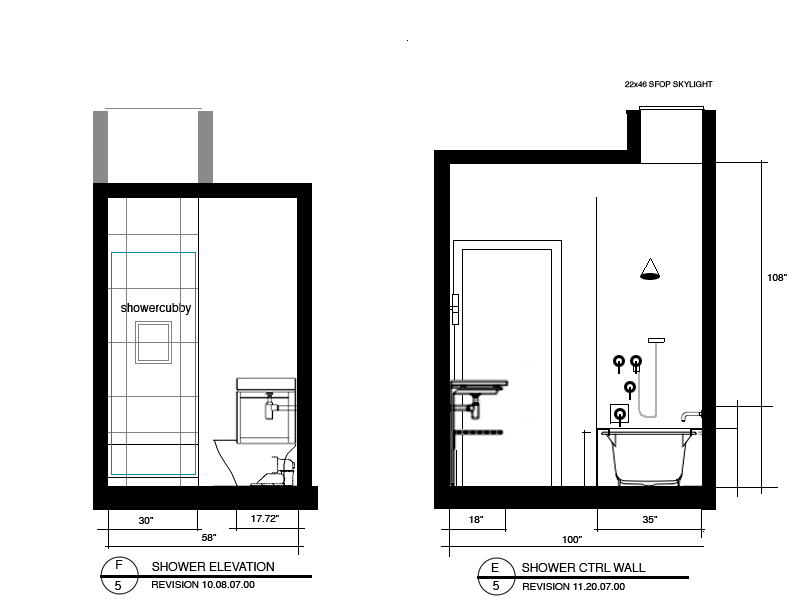
In this phase the new fixtures were white porcelain and chrome against the tiles and colored walls. The drawings indicate locations but in these tight spaces where centimeters matter the actual fixture positions were marked on site.
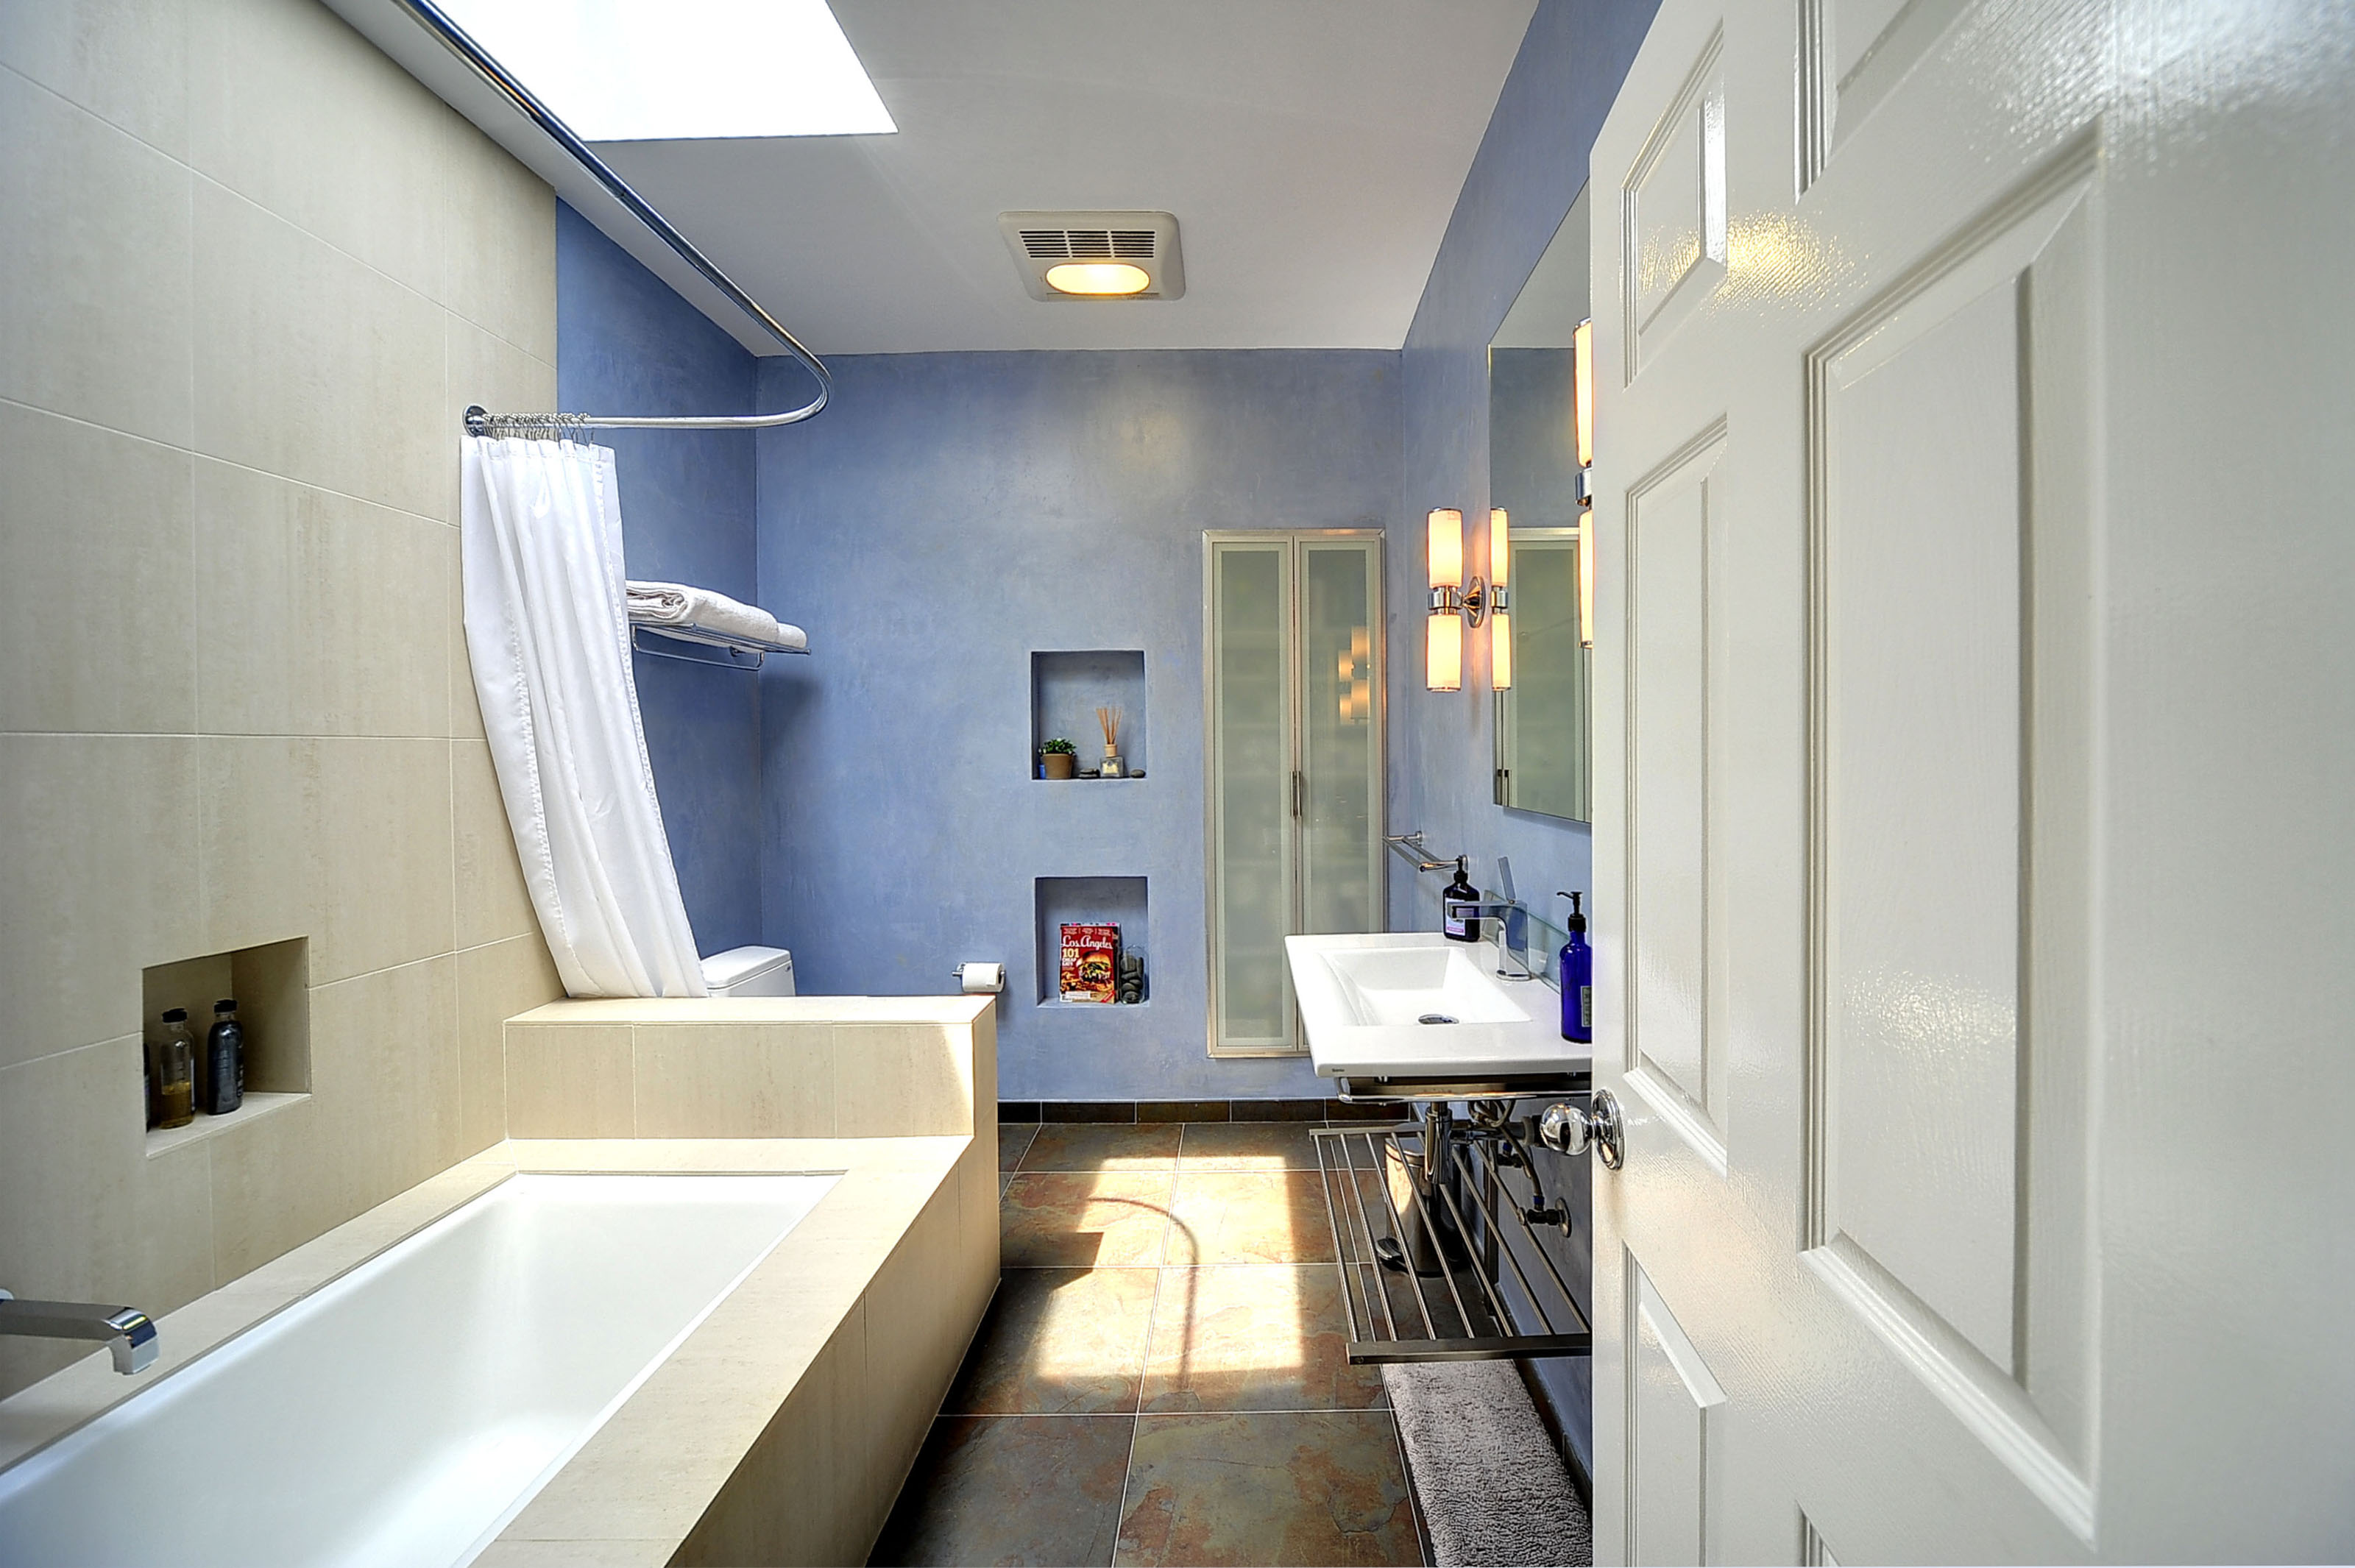
Bathroom Finishes
The color pallette contrasted monochrome white porcelain and reflective chrome against the texture of the clay finished walls and the tile patterns.
The full effect relies on the angle of natural light coming in from the skylight. The color changes throughout the day and there was no point trying to predict it with renderings like the kitchen.
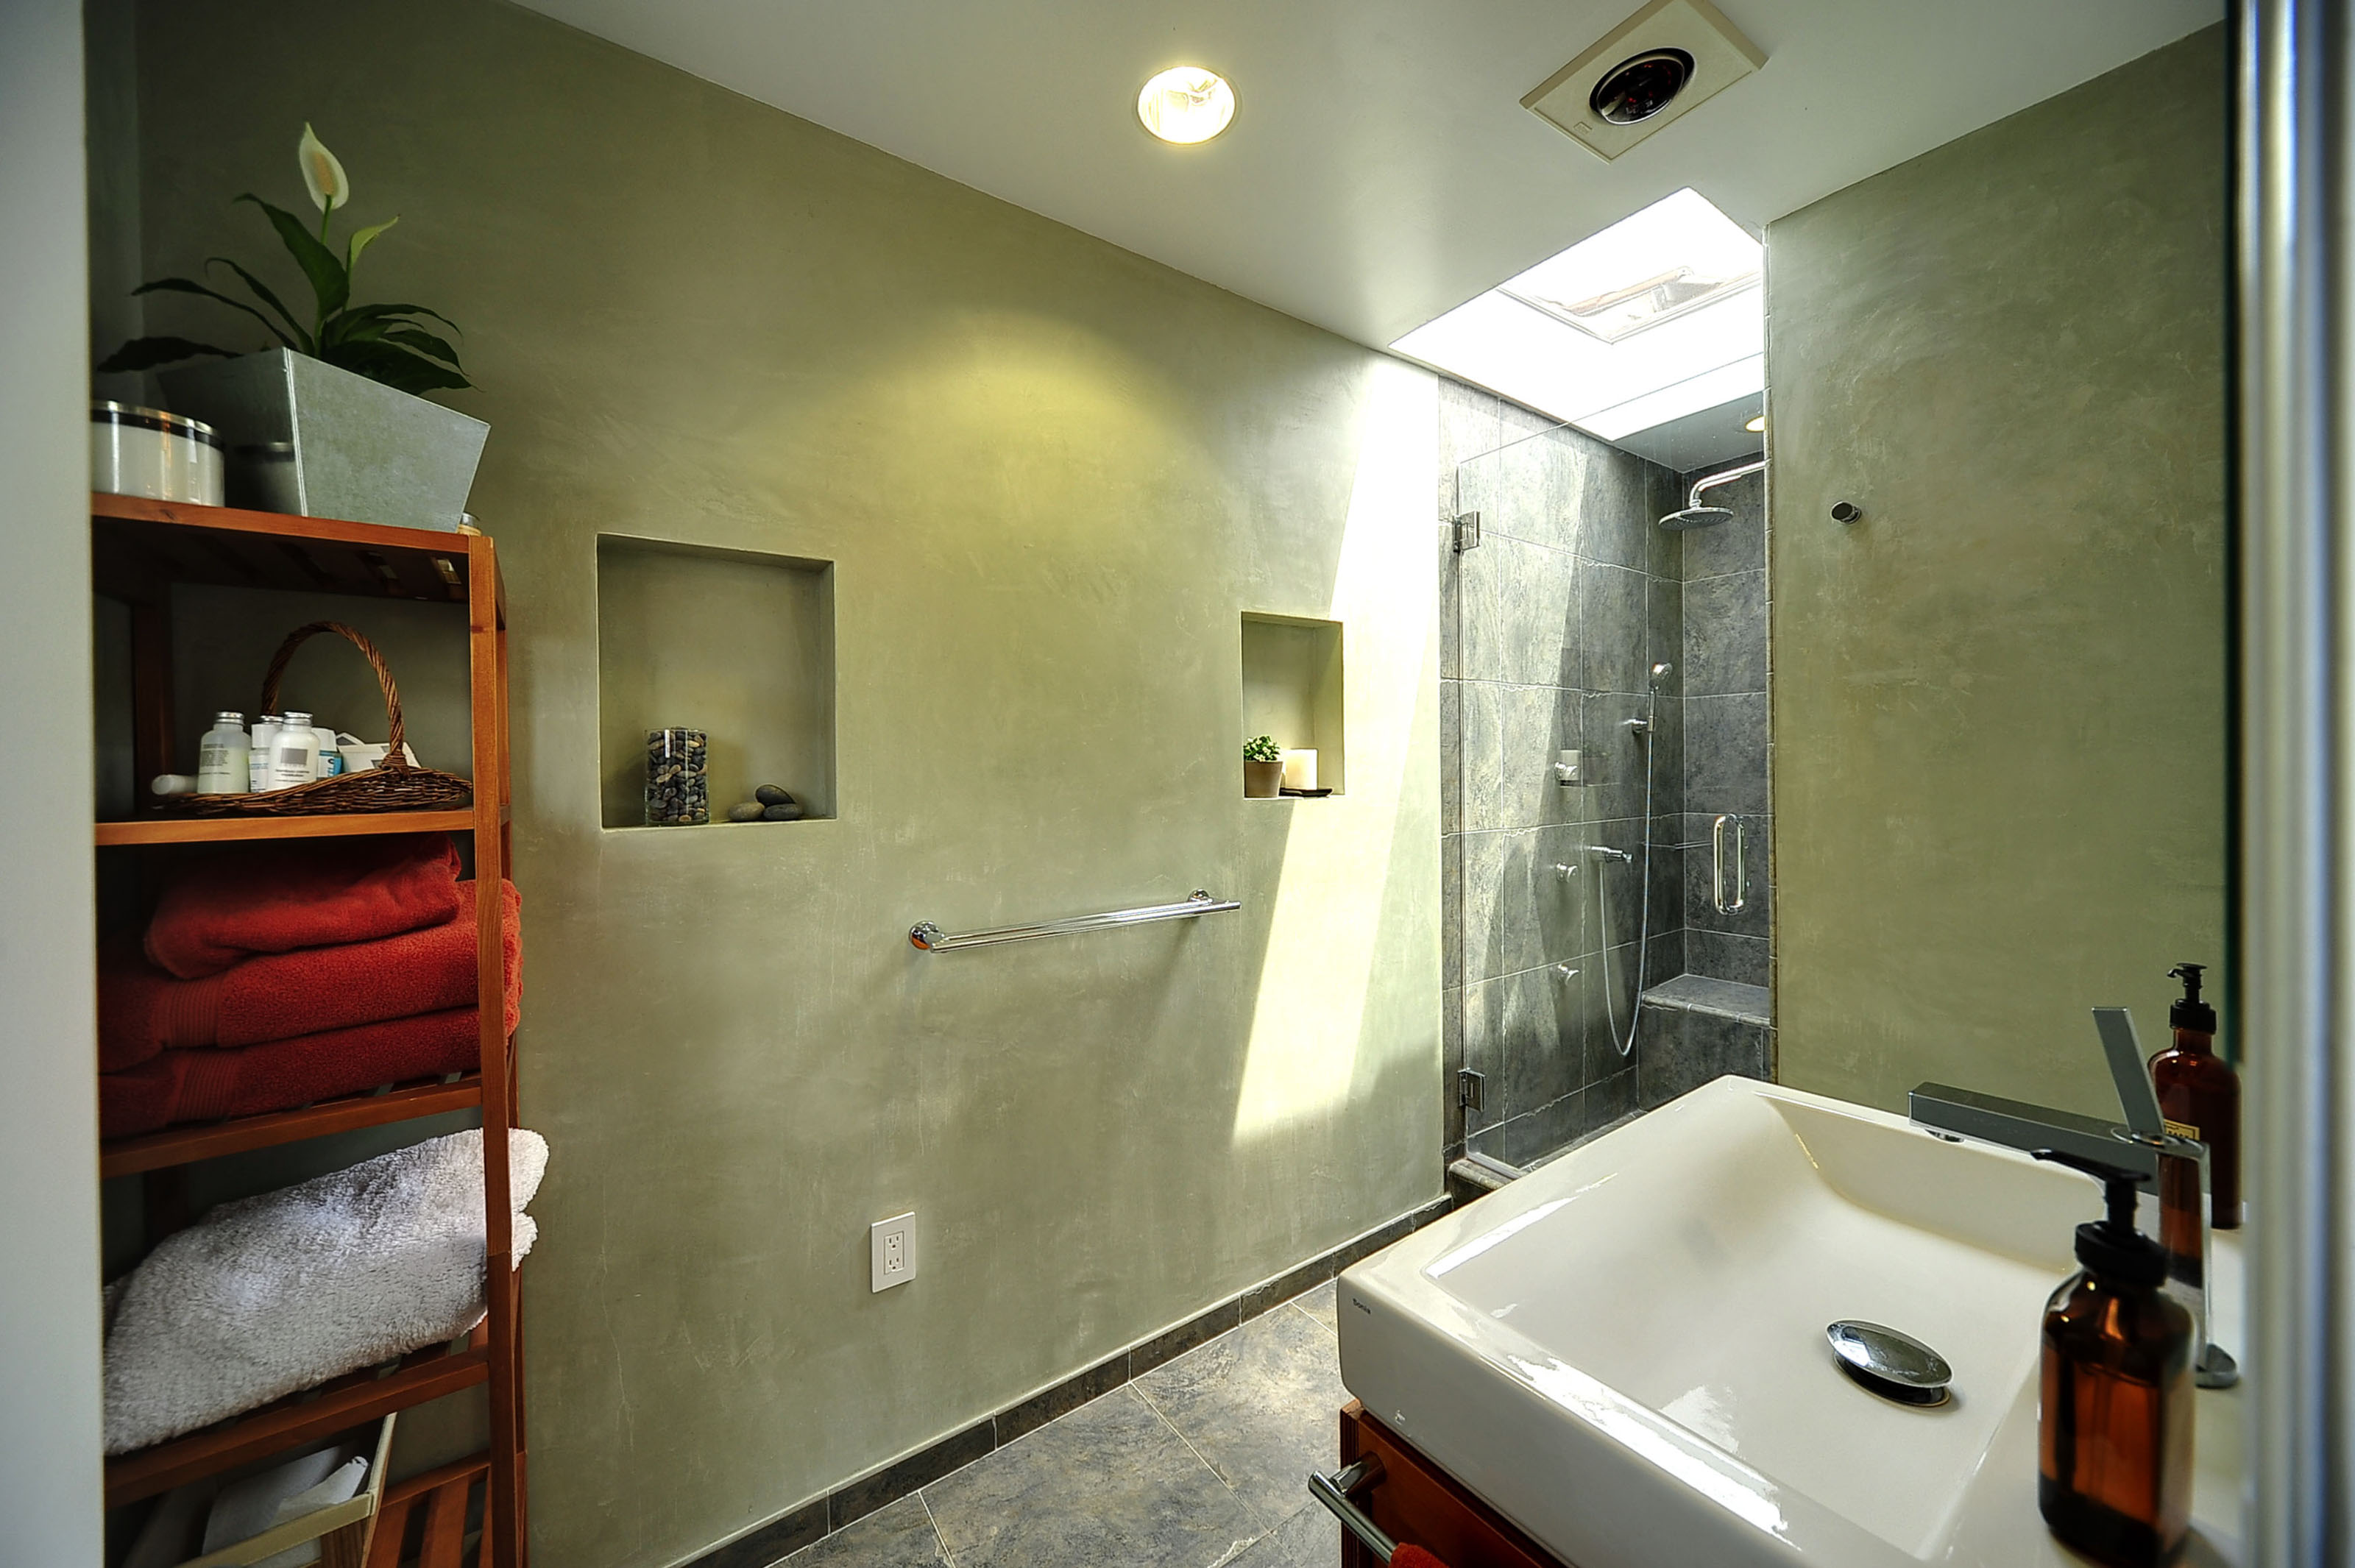
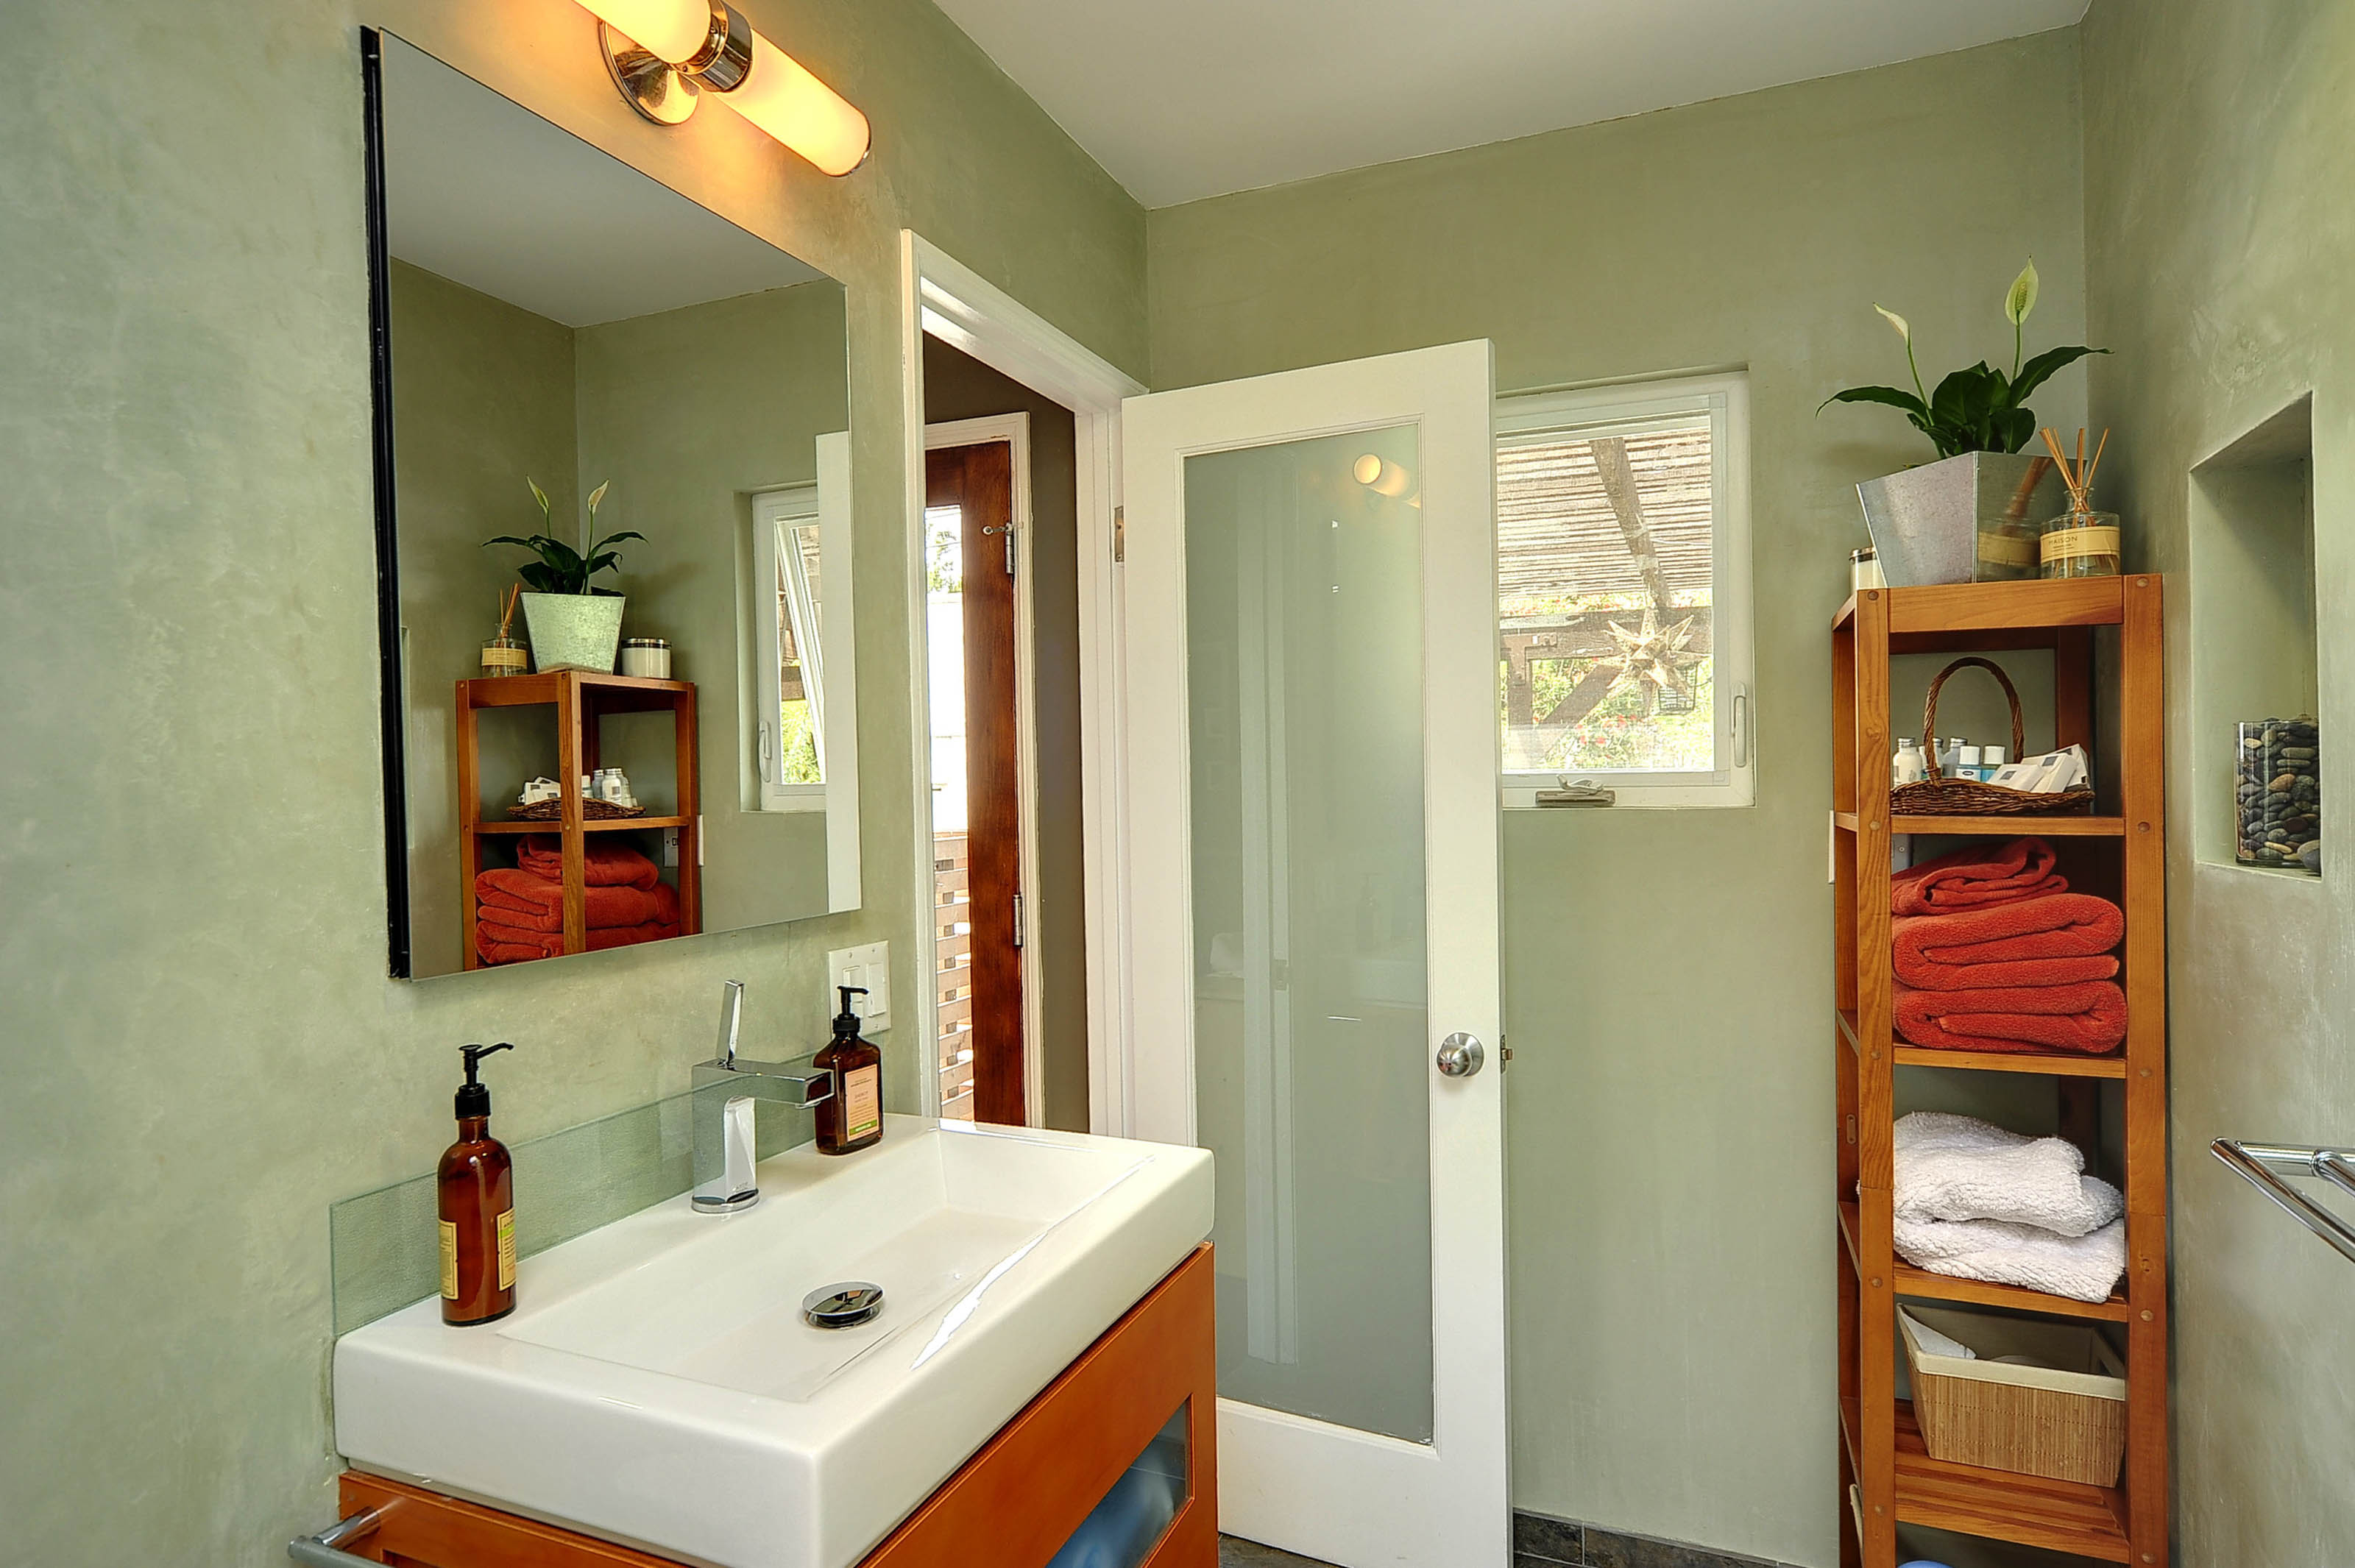
Once the ceilings were opened up it made more sense to match colors with actual tiles on site rather than rely on the color accuracy of photographs or paint samples.
The fixtures by HansGrohe Axor and Sonia were a known quantity. We had them on location prior to demo.
There really was no way to fully predict the final look of the American Clay finish on the walls. I had seen examples in showrooms and photos. My gut feeling that it would work as a backdrop to the other elements was confirmed.